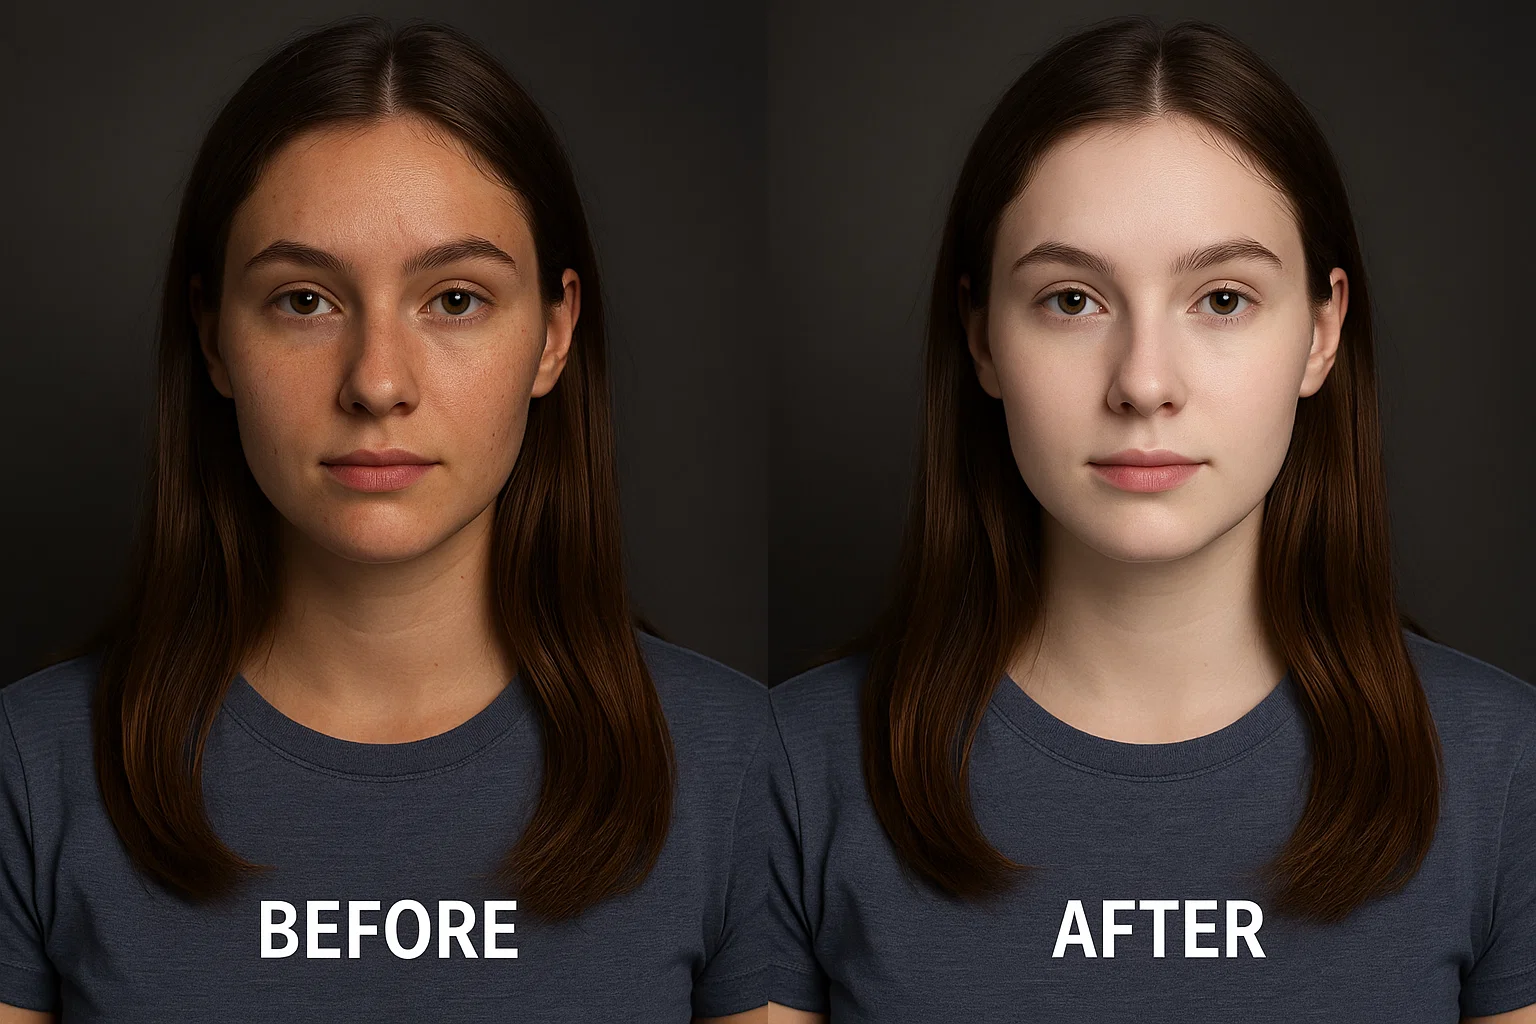
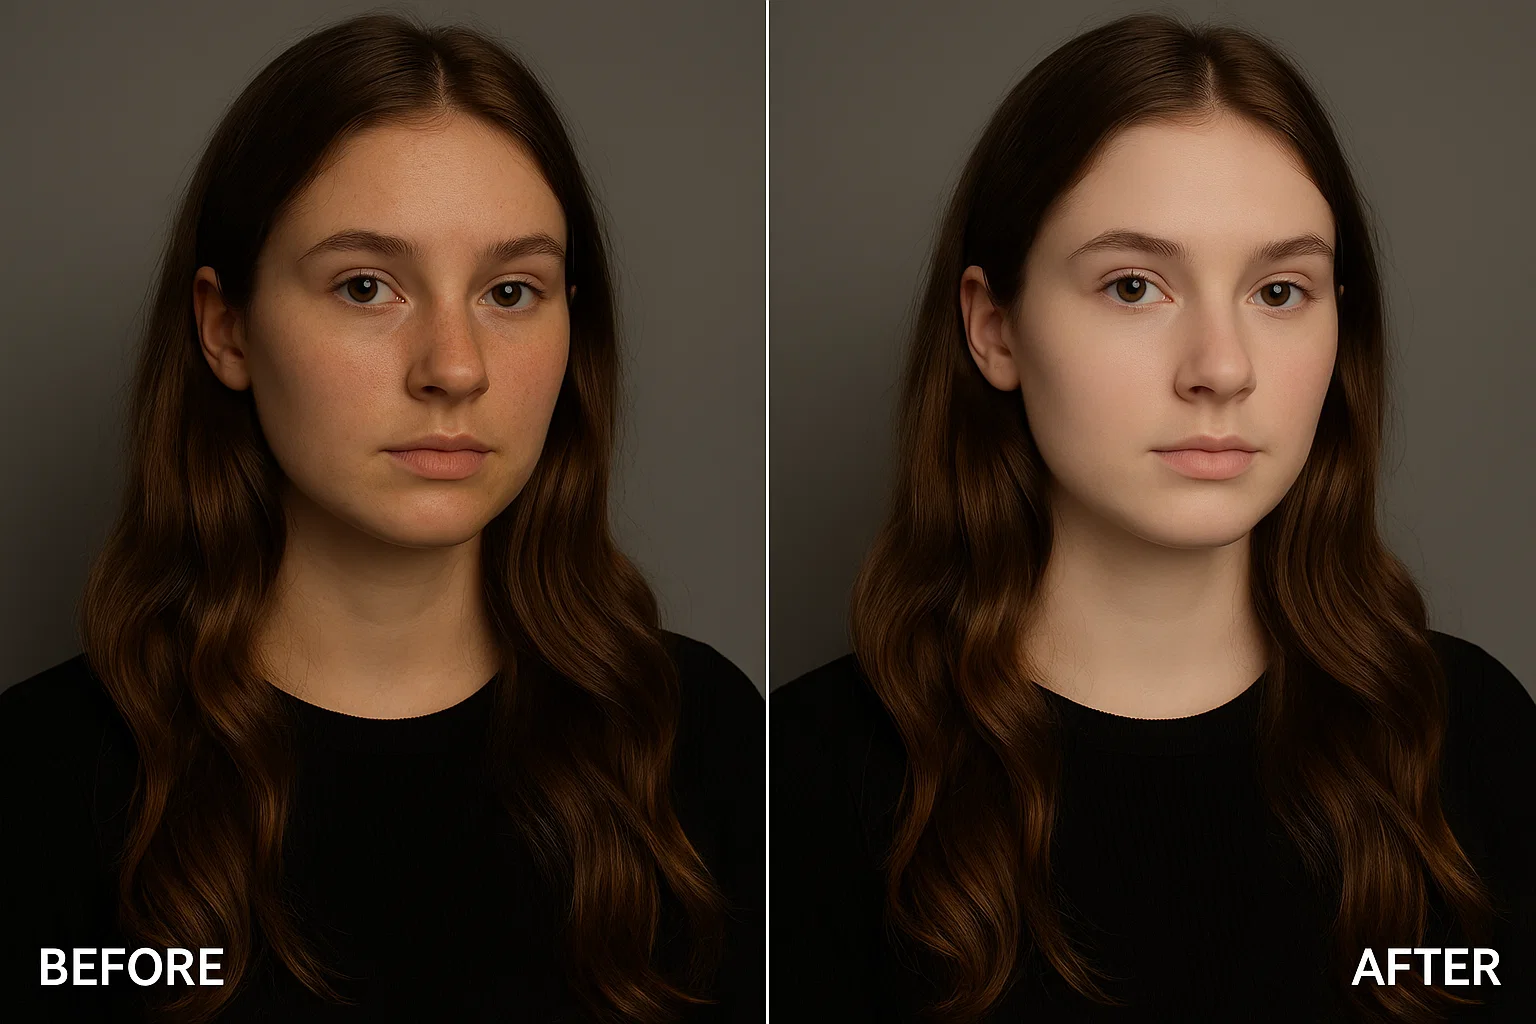
I still remember my first Photoshop Skin Whitening disaster—fresh outta college, I cranked the Curves layer so high my model looked like a glow-in-the-dark mannequin. My art director laughed so hard coffee shot out of his nose. Never again. After a decade of retouching gigs—from Instagram campaigns to glossy billboard spreads—I’ve honed a rock-solid workflow that brightens skin naturally, keeps pores intact, and never crosses the line into ghost-town.
This mega-guide packs over 2,000 words of practical tips, code snippets, and pro anecdotes so you can master Photoshop Skin Whitening once and for all.
Skin-Tone Science 101
Before we dive into juicy sliders, let’s geek out—just a little—about why human skin reacts the way it does under pixels and photons. Melanin density, hemoglobin flow, and surface oil define brightness, hue, and specular highlights. When we talk Photoshop Skin Whitening, we’re really balancing:
- Luminance (L): perceived brightness.
- Chrominance (a/b): the green-magenta and blue-yellow axes inside LAB space.
- Micro-contrast: the retention of texture at pore level.
Nail these three variables and you’ve nailed perfect skin. Miss one? Cue the plastic doll look.
Essential Prep Steps
- Calibrate your monitor. Factory settings lie. Use a puck, set gamma 2.2.
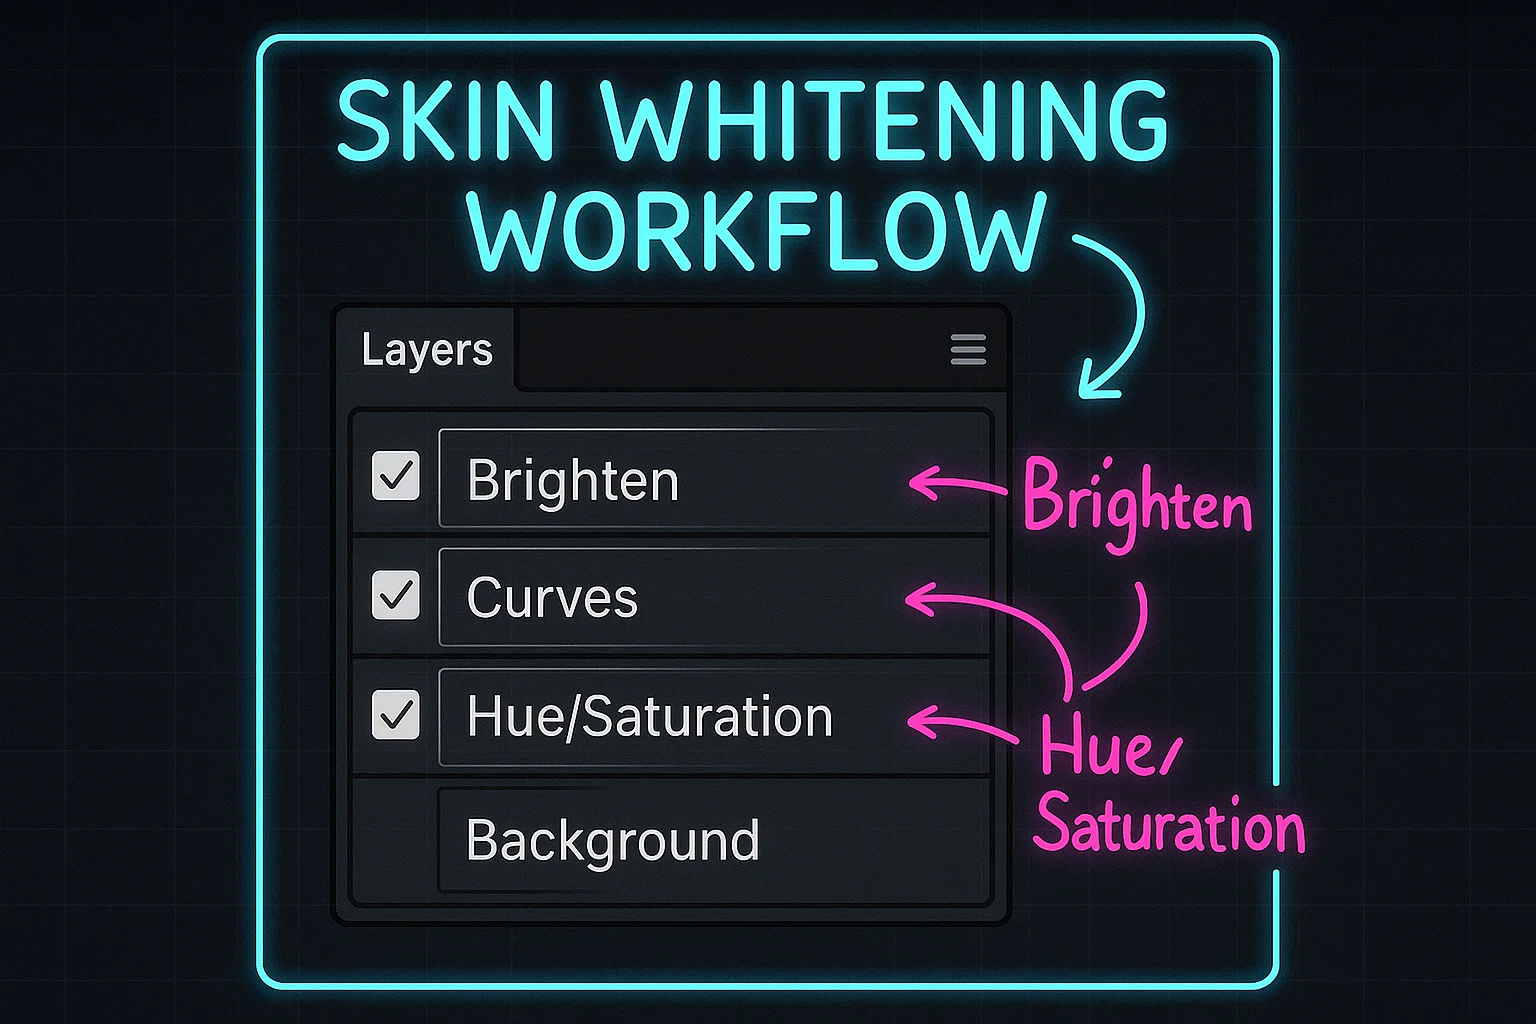
- Work non-destructively. Smart Objects + Adjustment Layers = unlimited undo.
- Convert to 16-bit. Those extra tones help blend subtle transitions.
- Create a “Check Layer” stack. A black-&-white top layer in Soft Light at 50 % reveals blotches instantly.
The 12 Game-Changing Secrets
Highlight-Targeted Curves Boost
Add a Curves Adjustment Layer, place a control point around input 190, and nudge it up. This targets highlights only, keeping shadows anchored. The result? Bright skin without nuclear-bright eyeballs.
Channel-Specific Sculpting
Toggle each RGB channel. Pull Red mid-highs down a hair, push Blue highs up. This cools yellow undertones—a cornerstone of refined Photoshop Skin Whitening.
Selective Color Two-Step
Grab a Select Color layer:
- Reds: Cyan +12, Magenta –5.
- Yellows: Cyan +25, Magenta –3.
Yes, it feels wild yanking Cyan into skin—but trust the process. Yellow cast? Gone.
LAB-Mode Lightness Hack
Merge visible (Ctrl+Alt+Shift+E), switch to LAB Color, copy the L channel, jump back to RGB, paste above, and set to Soft Light at 35 %. Instant controlled luminosity bump—zero color shift.
Frequency Separation for Texture Fidelity
Duplicate twice: Low Freq (Gaussian Blur 6 px) and High Freq (Apply Image, subtract). Heal blemishes on High, dodge-burn on Low. Texture stays intact while tones obey your every whim.
Camera Raw HSL Pre-Flight
Fire up Filter → Camera Raw. Under HSL:
- Orange Luminance +18
- Yellow Luminance +20
- Orange Saturation –6
This subtle prep makes downstream Photoshop Skin Whitening layers way easier to dial in.
Blend-If Precision Masks
Double-click your Curves layer, split the underlying sliders (Alt+drag) to limit adjustments to highlight pixels only. No manual painting, no haloes—just buttery transitions.
Color Lookup Tables (LUTs) for Tone Cohesion
Create a custom LUT that slightly compresses the b* axis in LAB. Load via Color Lookup at 20 % opacity. White stays white, but undertones harmonize across the frame.
Micro Dodge & Burn
Neutral Gray layer in Soft Light, 5 %-opacity brush. Gently lift ribs of light on cheekbones while deepening jaw shadows. This sculptural trick sells the realism of your Photoshop Skin Whitening.
Gradient Map Skin Glue
Sample darkest pore, mid-tone, and brightest highlight into a three-stop gradient map. Reduce to 15 %. It “glues” all tonal edits together—no patchy zones.
Smart-Object Adjustment Stacks
Convert your base layer to a Smart Object, then stack Curves → Selective Color → LUT. Tweak order anytime; the whitening world becomes nondestructive Lego bricks.
AI Masking & Neural Filters
Photoshop’s Select Subject + Select and Mask combo nails hair edges in seconds. For last-mile polish, Skin Smoothing Neural Filter at 10 % delivers a pore-friendly sheen—sweet, not synthetic.
Workflow Integration & Automation
Got a hundred headshots? Record secrets 1–8 into an Action, then wrap it inside a Droplet. Batch process a folder while you sip cold brew. Need motion? Import layered PSD into After Effects via Dynamic Link, add Lumetri Color, and your Photoshop Skin Whitening magic travels to 4K video too.
For color nerds, our Tonal Separation Guide digs deeper into isolating luminance zones, while the piece on Color Contrast & Harmony shows how to marry punchy backgrounds with gentle skin.
Common Pitfalls & Fixes
| Pitfall | Why It Happens | Quick Fix |
|---|---|---|
| Chalk-White Skin | Global exposure lift + saturation drop. | Roll back Curves, boost tiny Magenta in Reds channel. |
| Blotchy Patches | Hard-edged masks. | Feather mask 20 px or use Blend-If split. |
| Color Banding | 8-bit workflow. | Switch to 16-bit before heavy lifting. |
Exporting for Web & Print
- Web: sRGB, 85 % JPEG quality, Convert to Profile checked.
- Print: Adobe RGB, 300 dpi, embed ICC profile from your lab.
- Double-check skin at 100 % zoom; browser compression can nuke subtlety.
If you crave deeper color science rabbit holes, Adobe’s official Photoshop documentation stays evergreen.
Final Thoughts
Great Photoshop Skin Whitening isn’t a one-click miracle; it’s a dance between curves, channels, masks, and a dash of personal flair. With these 12 secrets—and a little patience—you’ll turn dull complexions into luminous head-turners without sacrificing authenticity. Now go brighten someone’s day, literally.