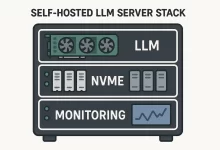
Ubuntu Server 24.04 LTS brings five years of support, performance boosts in Linux 6.8, and built-in container tools. This guide walks you through every command and menu click—from preparing your USB stick to locking down SSH—so you can deploy a production-ready server with confidence.

1. System Requirements & Preparations
- CPU: 2 cores @ 2 GHz minimum
- RAM: 4 GB (8 GB+ recommended)
- Disk: ≥ 25 GB (SSD preferred)
- Network: Wired Ethernet adapter
- Boot Media: USB stick (8 GB+)
- Secondary Machine: To download ISO and write USB
Tip: Enable virtualization (VT-x/AMD-V) in BIOS if you plan VMs.
2. Download & Validate the ISO
- Download
wget https://releases.ubuntu.com/24.04/ubuntu-24.04-live-server-amd64.iso - Verify Checksum
sha256sum ubuntu-24.04-live-server-amd64.isoCompare against the checksum on releases.ubuntu.com/24.04.
3. Create a Bootable USB
On Linux/macOS
sudo dd if=ubuntu-24.04-live-server-amd64.iso of=/dev/sdX bs=4M status=progress && sync> Replace /dev/sdX with your USB device (check with lsblk).
On Windows
- Download Rufus.
- Select your USB drive & ISO.
- Click Start.
4. Boot & Begin Installer
- Insert USB into target machine.
- Reboot and press F2/F12 (or your vendor key) to select USB boot.
- Choose Install Ubuntu Server at the initial menu.
5. Language, Keyboard & Network
- Language: English (US)
- Keyboard: US (or your locale)
- Network:
- DHCP: Automatic IP assignment.
- Static: Skip for now; configure later via Netplan.
6. Disk Partitioning
You have two main options:
Automatic (Recommended)
- Use entire disk – installer creates GPT, root, swap automatically.
Manual (Advanced)
- Create GPT partition table.
- EFI System Partition (512 MB, FAT32, mount at
/boot/efi). - Root (
/) (20 GB+, ext4). - Home (
/home) (optional, ext4). - Swap File (recommended over partition; we’ll add a 4 GB swap file post-install).
7. User Account & SSH
- Your name: Admin (for prompt)
- Server name: ubuntu24-server
- Username: ubuntuuser
- Password: strong, unique
- Install OpenSSH server: ✔️
> SSH Key Setup (on client machine):
ssh-keygen -t ed25519 -C "ubuntuuser@$(hostname)"
ssh-copy-id [email protected]
8. Finalize Installation
- Review changes and Confirm to write to disk.
- Wait for packages to finish.
- When prompted, remove the USB stick and reboot.
9. First-Boot & System Update
ssh [email protected]
sudo apt update && sudo apt full-upgrade -y
sudo reboot
10. Configure Swap File
sudo fallocate -l 4G /swapfile
sudo chmod 600 /swapfile
sudo mkswap /swapfile
sudo swapon /swapfile
echo '/swapfile none swap sw 0 0' | sudo tee -a /etc/fstab
11. Static IP via Netplan
- Identify interface:
ip link - Edit
/etc/netplan/01-netcfg.yaml:network: version: 2 ethernets: ens3: dhcp4: no addresses: [192.168.1.100/24] gateway4: 192.168.1.1 nameservers: addresses: [8.8.8.8, 1.1.1.1] - Apply:
sudo netplan apply
ip addr show ens3
12. Basic Security Hardening
- Change SSH Port:Edit
/etc/ssh/sshd_config, setPort 2222, thensudo systemctl restart sshd. - Disable Root Login:In
sshd_config, setPermitRootLogin no. - Enable UFW Firewall:
sudo ufw allow 2222/tcp sudo ufw allow http sudo ufw allow https sudo ufw enable sudo ufw status - Install Fail2Ban:
sudo apt install fail2ban -y
sudo systemctl enable fail2ban
13. Time Synchronization
sudo timedatectl set-timezone America/Los_Angeles
sudo apt install chrony -y
sudo systemctl enable chrony
14. Verify & Enjoy
- Reboot one more time:
sudo reboot. - Check services:
systemctl status ssh chrony fail2ban
ufw status verbose
Your Ubuntu Server 24.04 LTS is now fully installed, updated, and secured—ready for web services, databases, containers, or any production workload.

 FoxDoo Technology


