I’m gonna keep this practical. A couple of Sundays ago, I was knee-deep in a photo backlog, coffee going cold, rain tapping the window. I tossed a throwaway shot into Nano Banana, asked for a desk-ready figurine look, and my partner did a double take—“Which studio made that?” That reaction—curiosity + a tiny bit of disbelief—pretty much sums up why I’ve stuck with it.
What follows is a fully original, field-tested guide to nine things I do all the time—no fluff, no complicated graphs, just settings, prompts, and gotchas so you can make Nano Banana earn its keep.
Where Nano Banana Shines in Real Workflows
Nano Banana is strongest when you want believable edits that respect geometry, lighting, and material cues. Think brand visuals for indie shops, thumbnails for creators, catalog-style flat-lays, quick posters, pose-aware composites, and lifestyle swaps where the subject still feels like themselves. It plays nice with node-based tools (e.g., ComfyUI-style graphs) or simple batch scripts when you need reproducibility.
Under pressure—say, fifteen images due by end of day—you don’t want to wrestle a clever prompt every time. You want modular, repeatable instructions that stick. That’s the spirit here: small recipes you can remix.
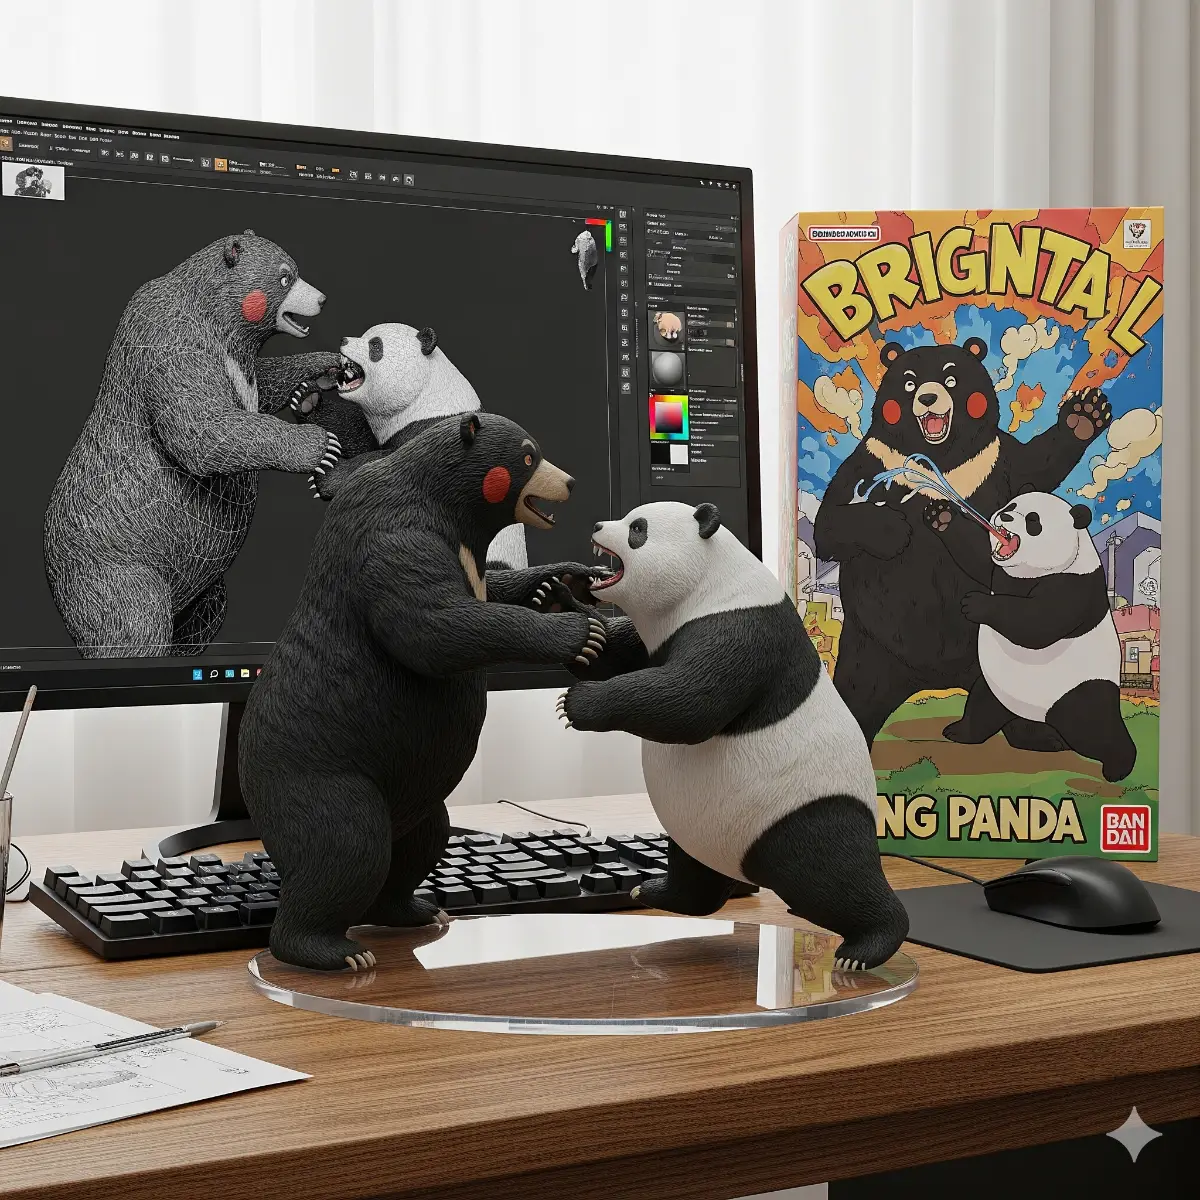
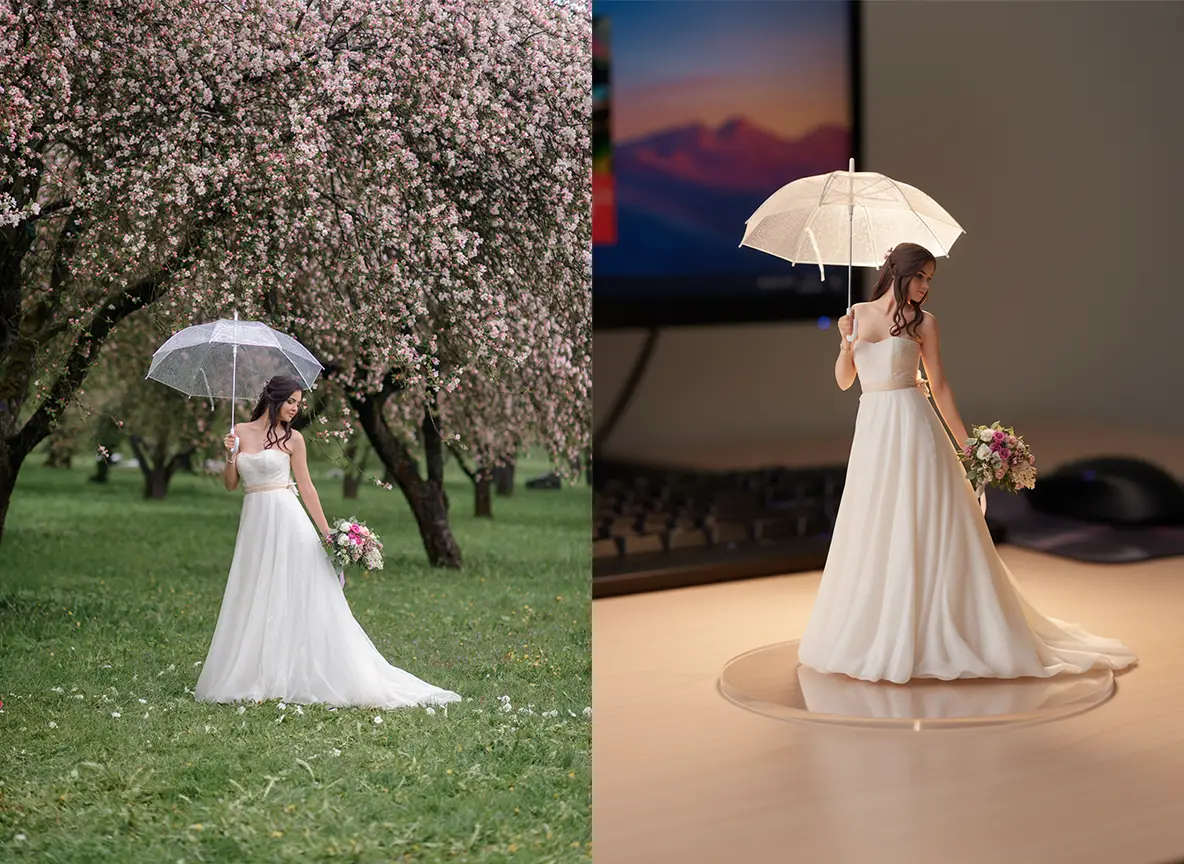
Move #1: Desk-Ready “Figurine Mode” (Product-Style Realism)
The goal: transform a portrait or character into a physically plausible figurine with a clean acrylic base, subtle reflections, and a commercial studio vibe. When tuned properly, Nano Banana respects edges and micro-highlights, giving you that “I could touch it” feel.
Starter Prompt
Create a 1/7 scale resin figurine of the subject on a work desk. Transparent circular acrylic base (no text). Soft key light + gentle rim. Shallow depth of field. Product-style clarity and realistic reflections.Steps That Matter
- Ask for “transparent acrylic base” and “no text” to avoid random labels.
- Lock color temperature (e.g., “neutral daylight 5600K”) for batch consistency.
- Hint “subtle studio reflection” so it reads glossy without plastic glare.
Why This Works
Product lighting teaches the model where to place specular hits and contact shadows. The acrylic base anchors the subject, sells scale, and keeps the scene honest. When you keep the lens description consistent (try “35mm or 50mm, f/2.8”), you’ll notice fewer composition surprises.
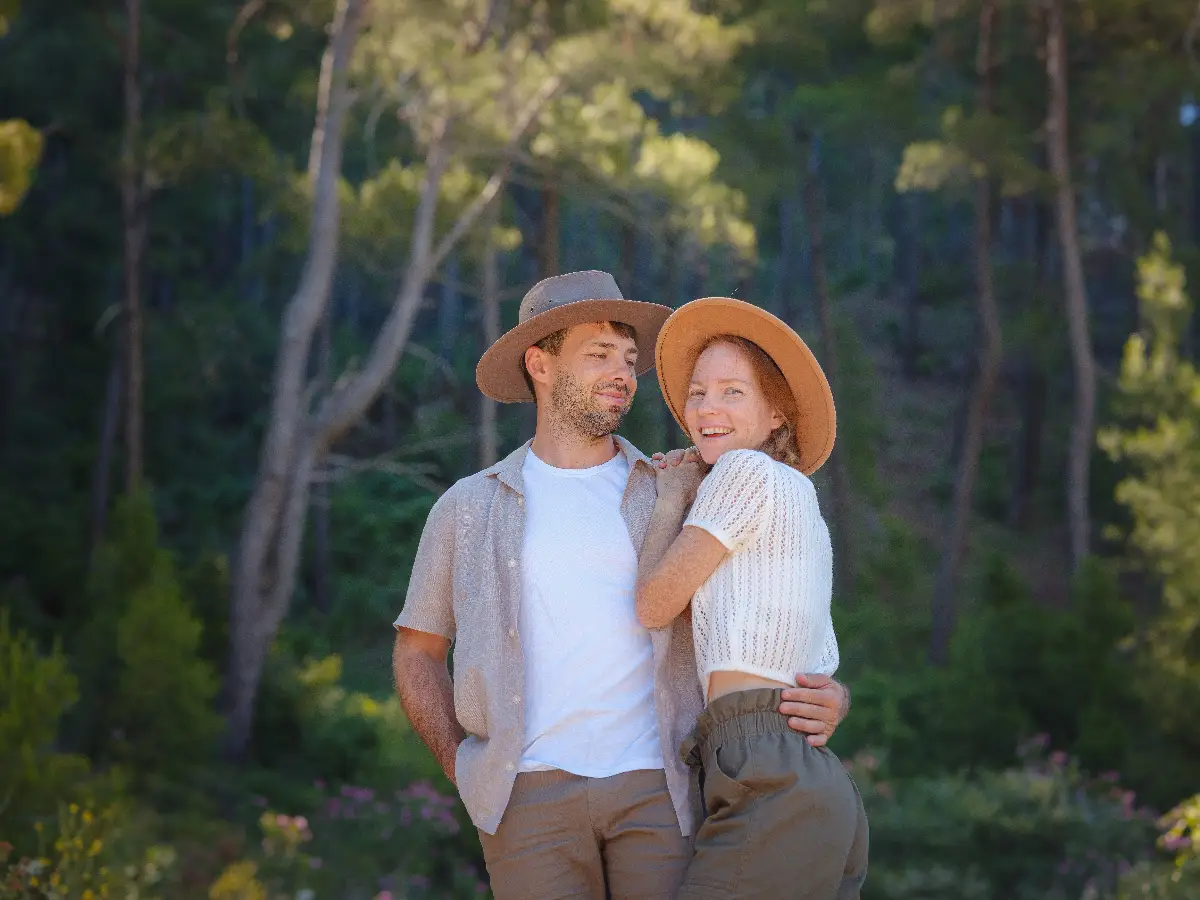
Move #2: Scene Swaps That Don’t Look Fake
Take a subject from a flat background and drop them into a European street at golden hour—cobblestones, café awnings, light flares. The hardest parts are perspective, color temperature, and believable hand-phone interactions. Nano Banana handles these if you’re explicit.
Prompt Scaffold
Convert the input selfie into a European street scene at golden hour, cobblestones and café awnings visible, natural crowd blur. Preserve facial identity; hands hold a phone naturally.Quality Checks
- Identity: Add “preserve identity; no over-smoothing.”
- Hands/phones: call out “hands gripping phone naturally.”
- Background: a touch of motion blur makes the street feel alive.
Extra credit: ask for “ambient bounce from warm façades” so skin picks up golden tones without orange crush.

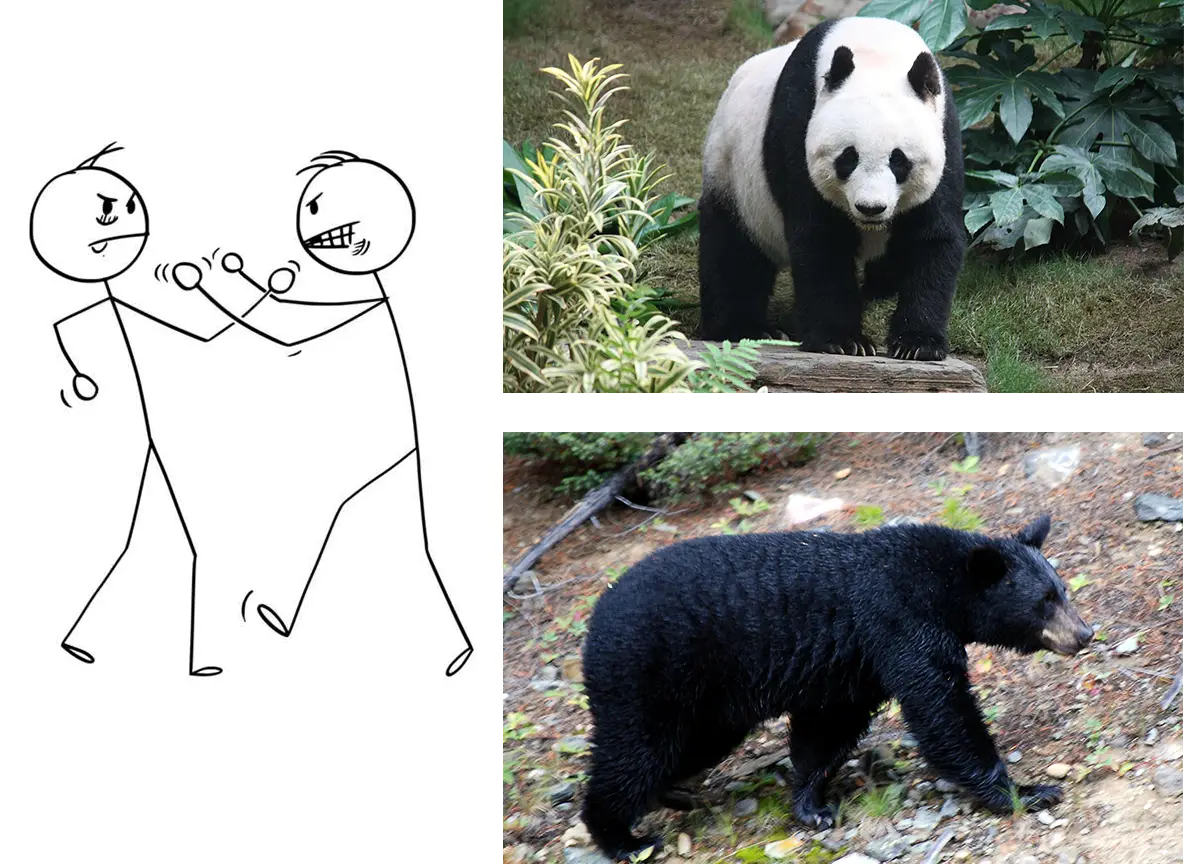
Move #3: Pose Transfer Without Over-Engineering
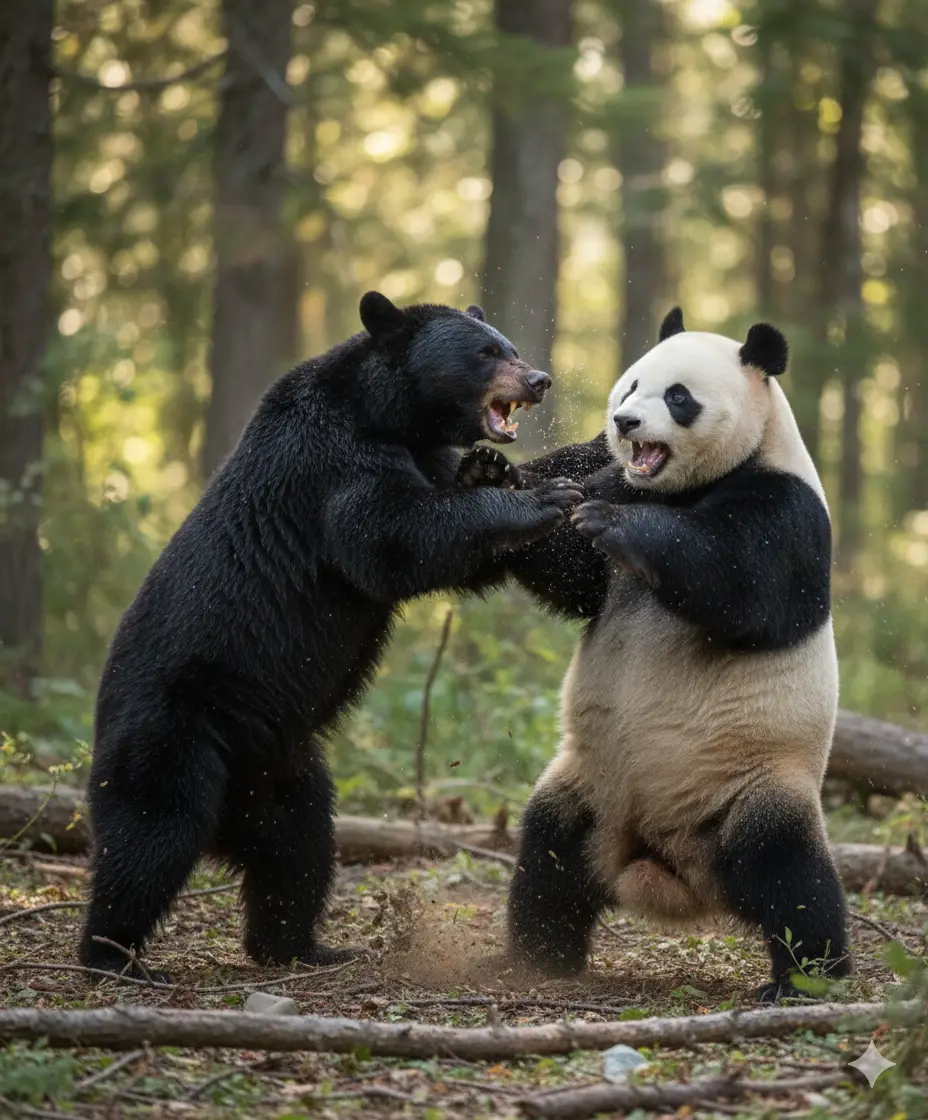
You’ve got a black bear and a giant panda, plus a stick-figure fight sketch (two stick figures). You want believable animal weight and intent—expression first, limb logic second. Skip the five-pass circus; use a clean prompt and consistent species references. Nano Banana is surprisingly obedient with simple composition guides.
Prompt Scaffold
Generate an image following the stick-figure fight sketch: a black bear and a giant panda in a dynamic clash; emphasize mass, balance, and facial expression.
Practical Setup
- Feed (a) the stick-figure fight pose guide (two figures with clear torso angles), (b) species identity refs for black bear (Ursus americanus) and giant panda (Ailuropoda melanoleuca), (c) an optional environment ref (forest clearing or bamboo grove).
- Say “honor composition from pose guide; respect species anatomy and fur patterns; keep paw/claw shapes natural; avoid human-like finger poses.”
- Keep backgrounds simple on the first pass (neutral forest floor or flat gradient). Once the faces and weight distribution land, add debris, bamboo leaves, mild motion blur, and contact shadows for realism.
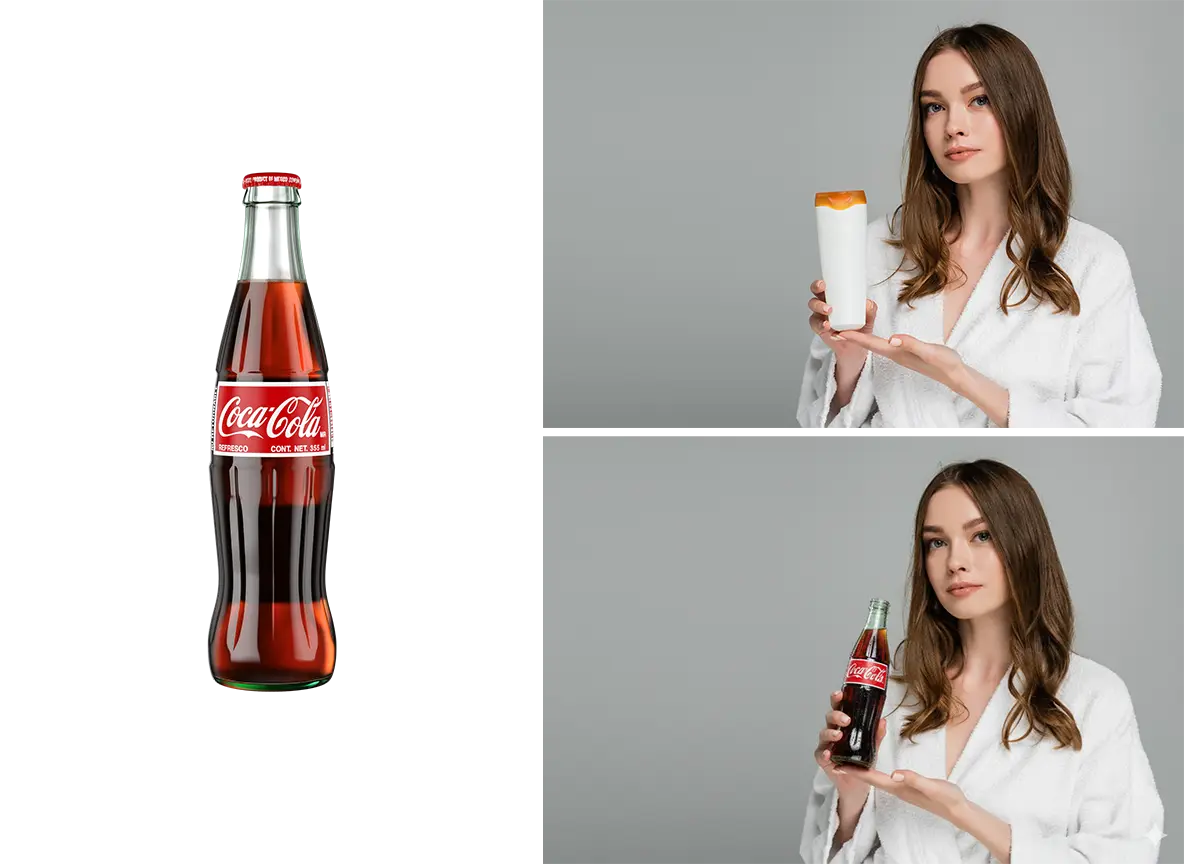
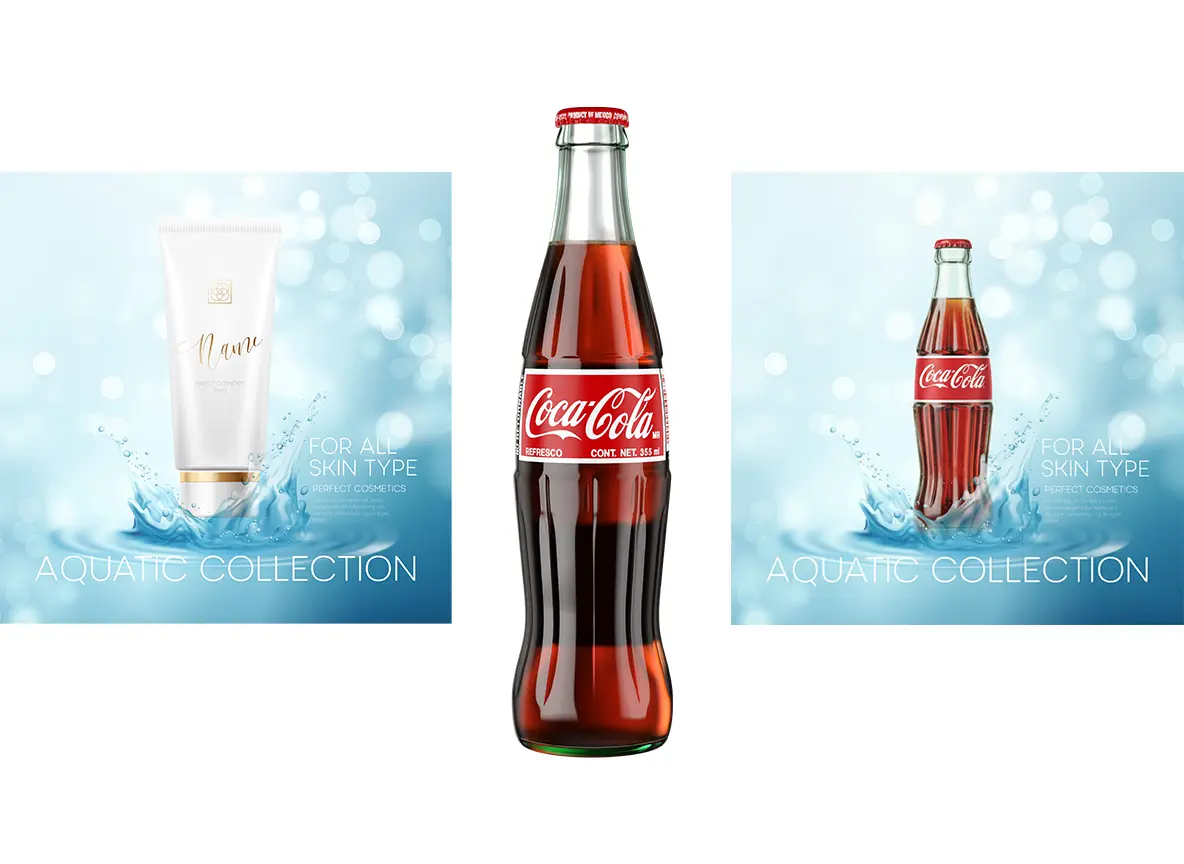
Move #4: Multi-Image Fusion (Borrow From Photo A, Act in Photo B)
Classic request: “Use the person from photo one, the cola from photo two, make it look like they’re drinking.” The secret is protecting what mustn’t change (hair, jacket texture, stitching, face) and being precise about contact points. Nano Banana listens when you lock details.
Prompt Scaffold
The person from image 1 is holding and drinking the beverage from image 2. Do not change hair, jacket texture, stitching, or facial details from image 1. Natural hand pose; small condensation on bottle; soft key light.Consistency Tricks
- Run one pass to stage the bottle. Run a second “cleanup” pass to remove guide marks.
- Call out “contact shadow under bottle” so it sits in the world, not on it.
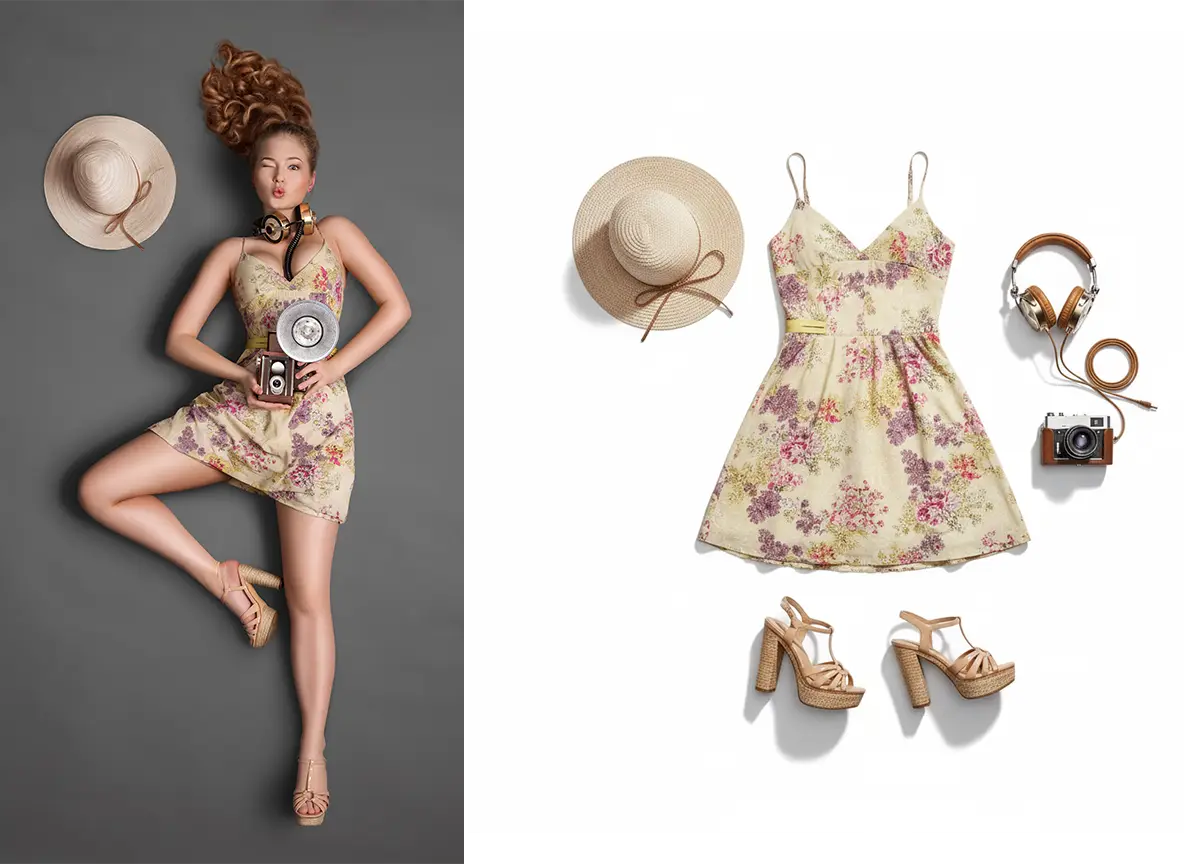
Move #5: Outfit Extraction for Clean Flat-Lays
Pull clothing off a model and lay it out on white. You want crisp edges, true fabric texture, and catalog-grade shadows. This is perfect for shops and look-books.
Prompt Scaffold
Extract the outfit from the model and lay each item on white sweep, commercial flat-lay style, gentle soft shadows, crisp edges, fabric texture preserved (stitching visible).Use Cases
- Shop catalogs where every SKU needs the same look.
- Editorial mood boards that swap colors and accessories fast.
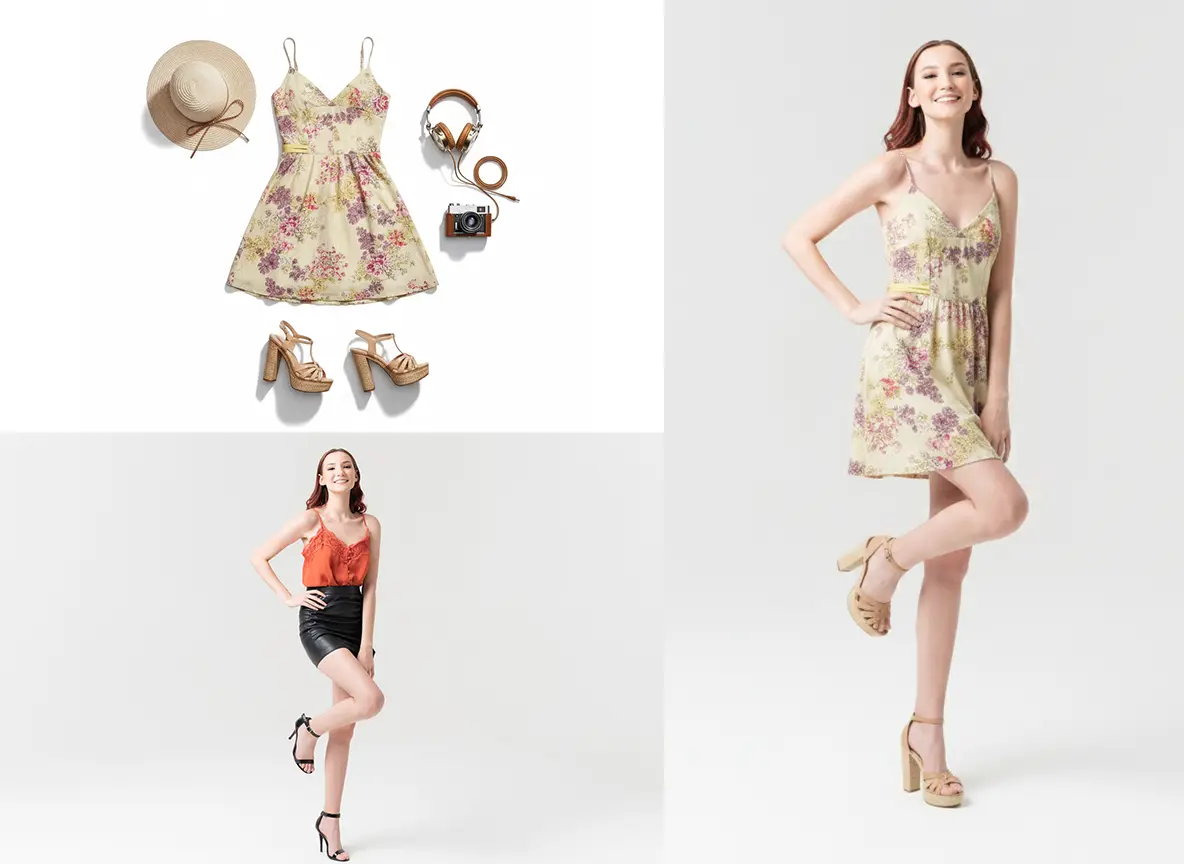
Move #6: Outfit Swaps That Actually Fit
Now put the flat-lay from move #5 onto a new person. Necklines, sleeves, and drape often betray fakes. Nano Banana does better when you specify physics.
Prompt Scaffold
Put the clothes from image 1 on the woman in image 2. Retain her hair, skin tone, and pose. Fabric drape follows gravity; subtle wrinkles at elbows and waist. No artifacts at neckline or cuffs.Realism Hints
- Request “contact shadows under hems” and “micro-wrinkles near joints.”
- Specify cloth types (linen vs. satin) to steer highlights and folds.
Move #7: Element Relocation With Color Cues
Place an object exactly where you want it. Paint a green box as a marker in a draft, then ask for a clean final without the marker. This workflow is shockingly effective when art-directing layouts. Use it for bottles, phones, logos, or small props.
Prompt Scaffold
Place the bottle from image 1 at the green-box location in image 2. Generate the final image with no green marks or artifacts. Preserve background lighting and texture.Production Tip
Two-pass approach: (1) placement draft with obvious guide marks, (2) clean remove pass. You’ll reduce guesswork and QA time.
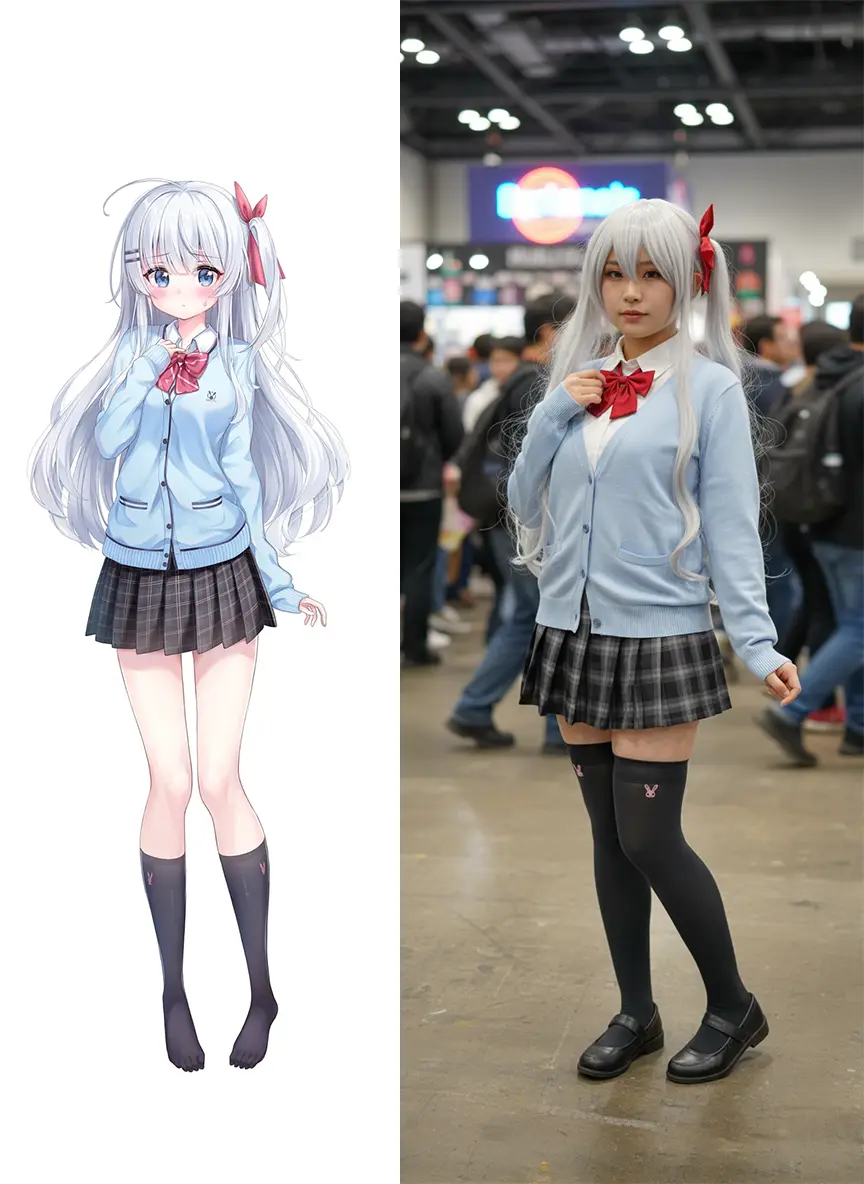
Move #8: Cosplay Synthesis at Real Events
Translate an illustration’s outfit onto a real person, set them at a convention. Scale props, keep wig fibers sharp, maintain real skin tones. Nano Banana shines when you balance stylization with honest lighting.
Prompt Scaffold
Generate a photo of a person cosplaying the reference illustration on a crowded convention floor; real skin tones and lighting; sharp wig fibers and clean prop edges; no posterization.Ethics & Permissions
- Get consent. Follow event rules. Disclose sponsorships.
- Avoid using anyone’s likeness for commercial work without clear rights.
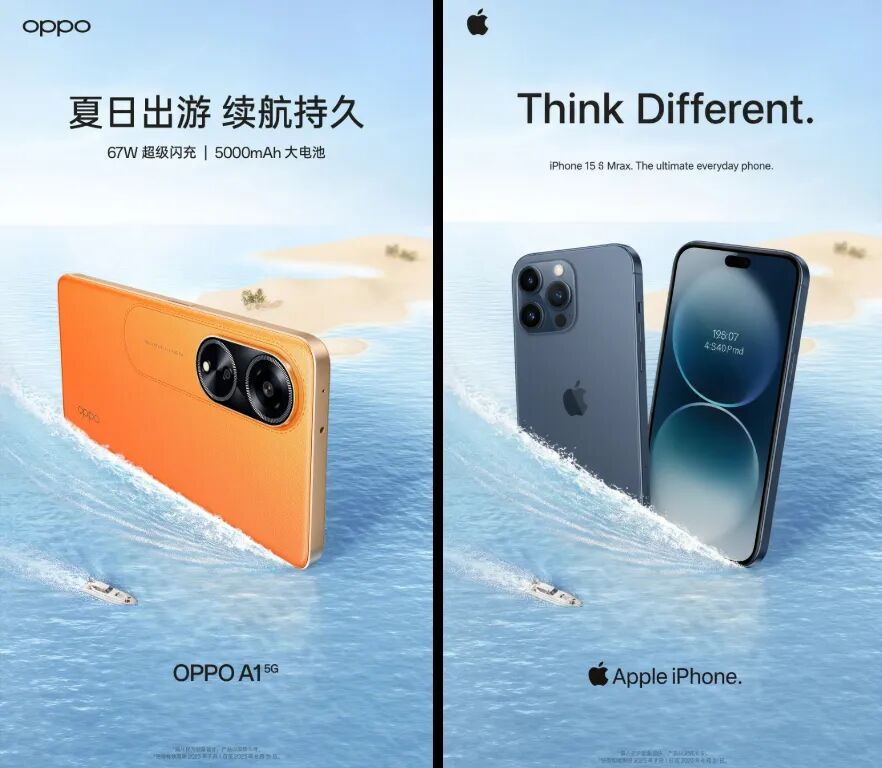
Move #9: Replace & Restyle Without Breaking the Poster
Swap a product, logo, or headline while keeping the original lighting and background intact. This is where Nano Banana feels like a superpower for last-minute marketing changes.
Prompt Scaffold
Replace the product in the poster with a modern smartphone. Replace the brand logo appropriately and update the headline. Keep the original lighting, shadows, and background intact.Brand Hygiene
- Provide brand hex colors; ask for “edge-aware relighting” to ground the new object.
- Limit font swaps to families that match x-height and weight; consistency beats novelty.
Automation Recipes (Tiny but Mighty)
When deliverables pile up, I wrap repeatable tasks in small scripts. The trick is to control the variables that matter (seed, white balance, lens) and expose the rest as arguments. You’ll get consistent output without hand-holding every step.
// pseudo-example: structure a reusable image-edit call async function nbEdit({subject, ref, prompt, seed = 42, lens = "35mm f/2.8"}) { const body = {subject, ref, prompt, seed, lens, guidance: 7.5, wb: 5600}; const res = await fetch("/nb/api/v1/edit", { method: "POST", headers: {"Content-Type": "application/json"}, body: JSON.stringify(body) }); if (!res.ok) throw new Error("NB edit failed"); return await res.blob(); }Start small: one function per move (figurine, swap, pose). Save prompts in version-controlled snippets so your team isn’t hunting Slack for “that one prompt that worked last month.”
Editing Tips That Actually Move the Needle
- Faces First: If identity matters, literally say “preserve identity; no over-smoothing.”
- Hands & Props: Name the object (“phone,” “bottle”) and the action (“grip naturally,” “rest on table”).
- Drape & Shadows: “Fabric drape follows gravity” and “contact shadows under object” cut cardboard vibes.
- Batch Consistency: Fix seed, lens, and white balance. Tiny changes here cause big visual drift.
- Background Honesty: A hint of ambient bounce light (golden façades, neon spill) does more than cranking saturation.
Common Mistakes & How I Debug Them
- Plastic Skin: Add “natural skin texture; no plastic sheen.” Reduce overly soft keys.
- Floating Objects: Ask for “contact shadow” and “subtle ground reflection” if appropriate.
- Wobbly Hands: Be explicit—“fingers wrap the bottle; thumb visible near label.”
- Off-Brand Colors: Pin brand hex values and specify finish (matte vs. glossy) for logos and UI elements.
- Pose Drift: Re-assert the composition source (“honor pose guide”) every time you change subjects.
Power-Up References (Internal & External)
For deeper dives into production-grade tactics and case studies, here are two internal articles I keep coming back to, plus two external reads that explain the “why” behind modern image pipelines:
- AI Agents for Developers — Production Guide 2025
- Qwen3.0-6B: Production Wins
- Google AI Blog
- MIT Technology Review
My Personal Shortcut Library (Steal These)
Over time I saved tiny prompt fragments that behave like Lego blocks. Mix, match, and tune to taste:
- Identity Lock: “preserve identity; no skin over-smoothing; maintain hair flyaways.”
- Studio Look: “neutral daylight 5600K; soft key + gentle rim; 35mm f/2.8; shallow DOF.”
- Street Swap: “European alley; warm façades; natural crowd blur; golden hour bounce.”
- Product Grounding: “edge-aware relighting; contact shadow; tiny specular highlights.”
- Fabric Truth: “linen weave visible; micro-wrinkles at elbows/waist; hem contact shadow.”
Why I Keep Reaching for Nano Banana
Speed and honesty. The more I standardize lens, light, and color, the more everything feels like it came from the same camera crew—fast. And when the results make people ask “Where did you shoot that?”, I know Nano Banana is doing the quiet, boring work that lets a small team punch above its weight.