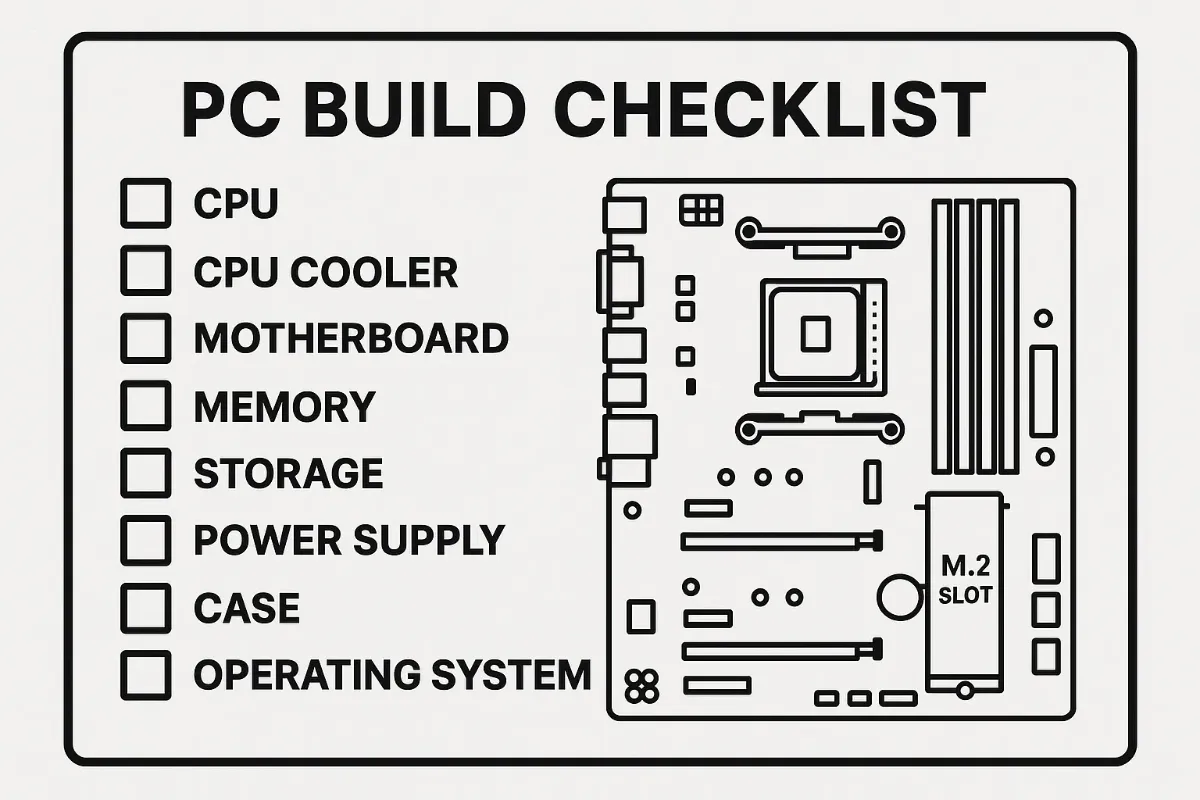
PC build checklist — three little words that separate a flawless fresh rig from a headache-ridden money pit. I learned that the hard way last winter when a friend’s brand-new RTX-rig stuttered like a decade-old toaster because we’d skipped one “minor” post-build tweak. Don’t repeat my pain. Grab a coffee, crack those knuckles, and walk through this PC build checklist with me, step by step.
Turns out a lot of builders—myself included—skip the small stuff. A tutorial I skimmed lists simple oversights like using the wrong M.2 slot or flipping a case fan the wrong way, both of which can chop performance in half. Today we’ll dive deeper, slap on some extra engineer-grade detail, and sprinkle in real-world war stories.
1. PC Build Checklist Step #1 – Pick the Right M.2 Slot
That shiny 7 GB/s NVMe drive deserves unfettered PCIe lanes. On most modern boards, the slot closest to the CPU (often labeled M2_1) is wired directly to the processor. Stick your SSD anywhere else and you’ll funnel bandwidth through the chipset, inviting latency and throttles.
- Intel Z790 & AMD X670E nuance: primary slot = PCIe 5.0 x4; downstream slots = PCIe 4.0 or even 3.0.
- Firmware tip: Disable “PCIe Link Speed Auto” in BIOS and force Gen 5 for bleeding-edge drives.
- Thermal reality: Controller temps spike 15 °C higher on lower slots wedged under GPUs.
Need context on future bus speeds? Peek at our PCIe 7.0 deep dive—that spec’s gonna make today’s numbers look sluggish.
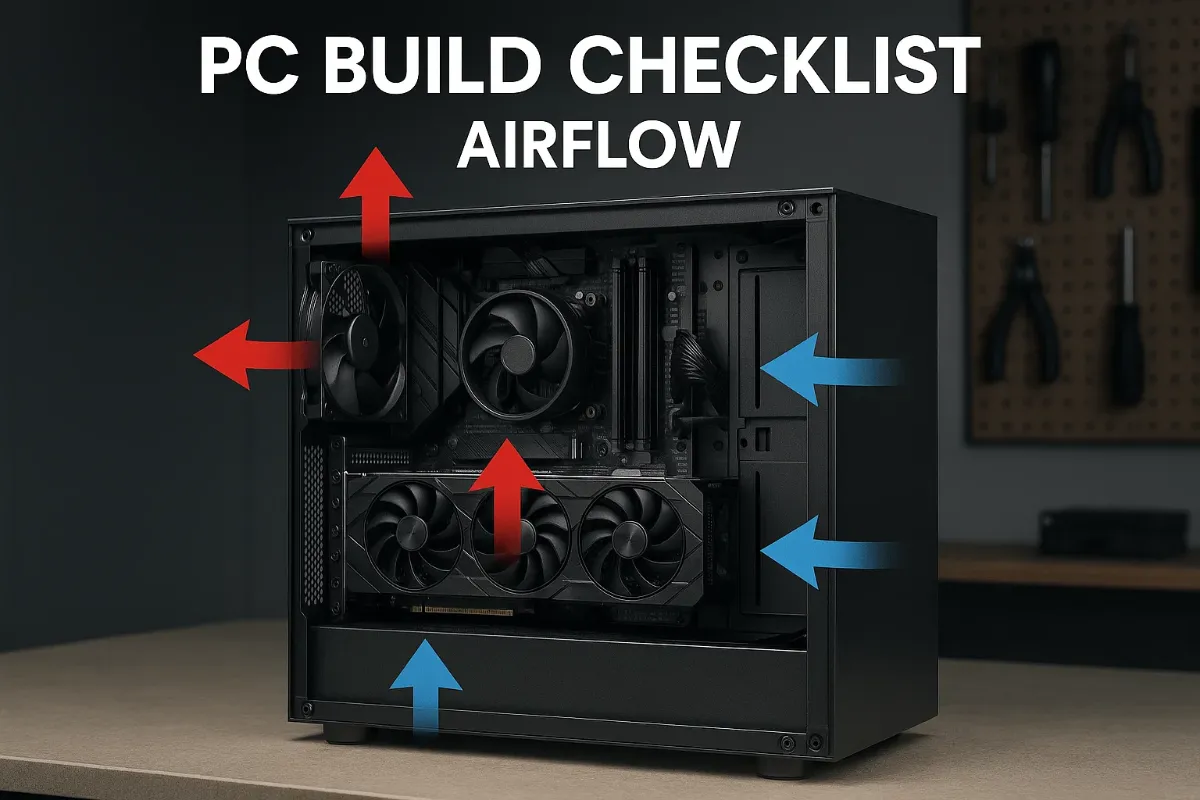
2. PC Build Checklist Step #2 – Fix Fan Direction & Airflow
Positive pressure, negative pressure, mesh fronts, tempered-glass sides—buzzwords galore. Strip it back: cool air in, hot air out. A single reversed fan can trap 40 °C exhaust inside the GPU shroud. Quick test? Hold a tissue near the grill—if it flutters inward on an exhaust fan, you messed up.
# Linux sensor sanity
watch -n2 sensors | grep "edge\|Tdie"
I once flipped a 140 mm top fan to exhaust at a LAN party and shaved 11 °C off VRM temps. Felt like cheating.
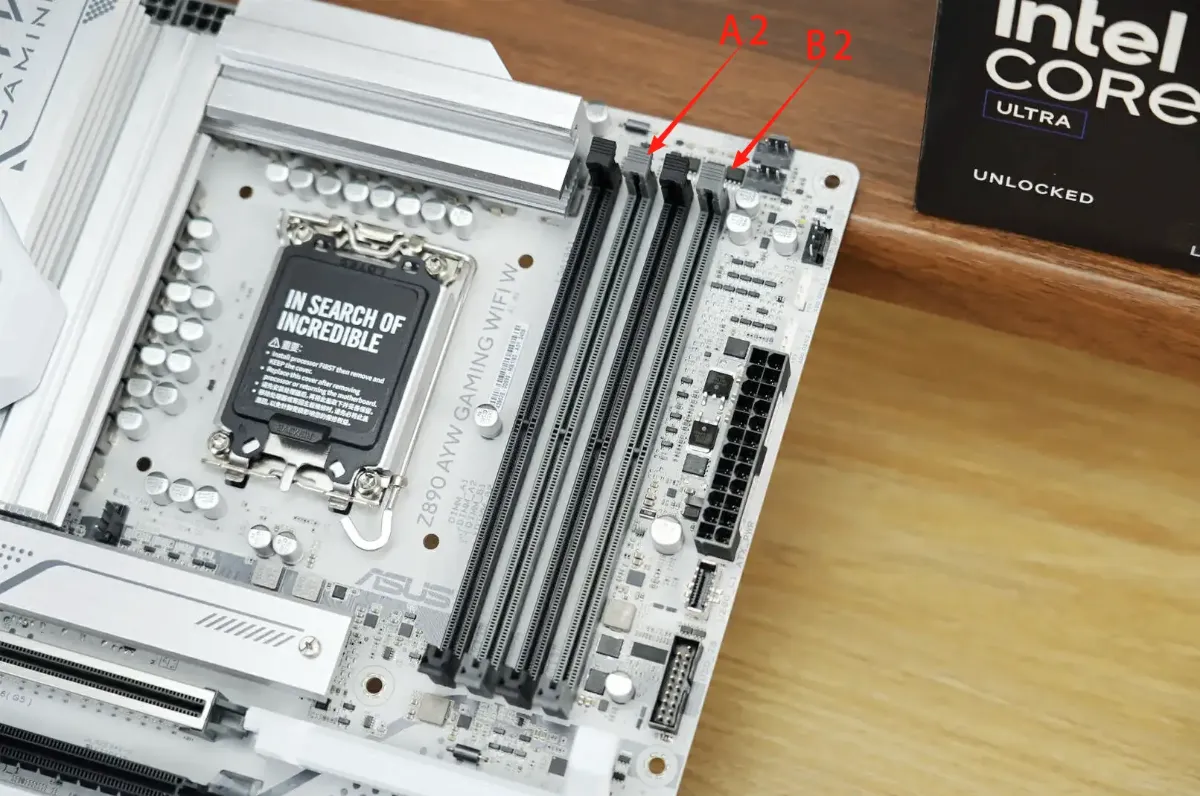
3. PC Build Checklist Step #3 – Populate RAM the Smart Way
Dual-channel loves symmetry. Four-slot boards almost always want sticks in A2 and B2 first. Miss that and you’ll hobble bandwidth by ~45 %. Pair this with XMP/EXPO profiles to unleash rated clocks.
| Board | First Pair | Max Stable DDR5 OC |
|---|---|---|
| ASUS ROG Z790-H | A2 & B2 | 7800 MT/s |
| MSI B650 Tomahawk | A2 & B2 | 6400 MT/s |
Curious whether DDR5’s extra lanes matter for you? Check our hands-on DDR5 vs. DDR4 memory shoot-out.
4. PC Build Checklist Step #4 – Force UEFI & Secure Boot
Still rocking “Legacy + CSM”? Stop. GPT partitions over 2 TB, Resizable BAR, Windows 11—all need pure UEFI. Flip CSM to Disabled, enable Secure Boot, and set the OS type to “Windows UEFI”. Done.
# Check partition style in PowerShell
Get-Disk | Select Number, PartitionStyle
Bonus: NVMe boot times drop 2-3 s when BIOS doesn’t waste cycles polling for MBR drives.
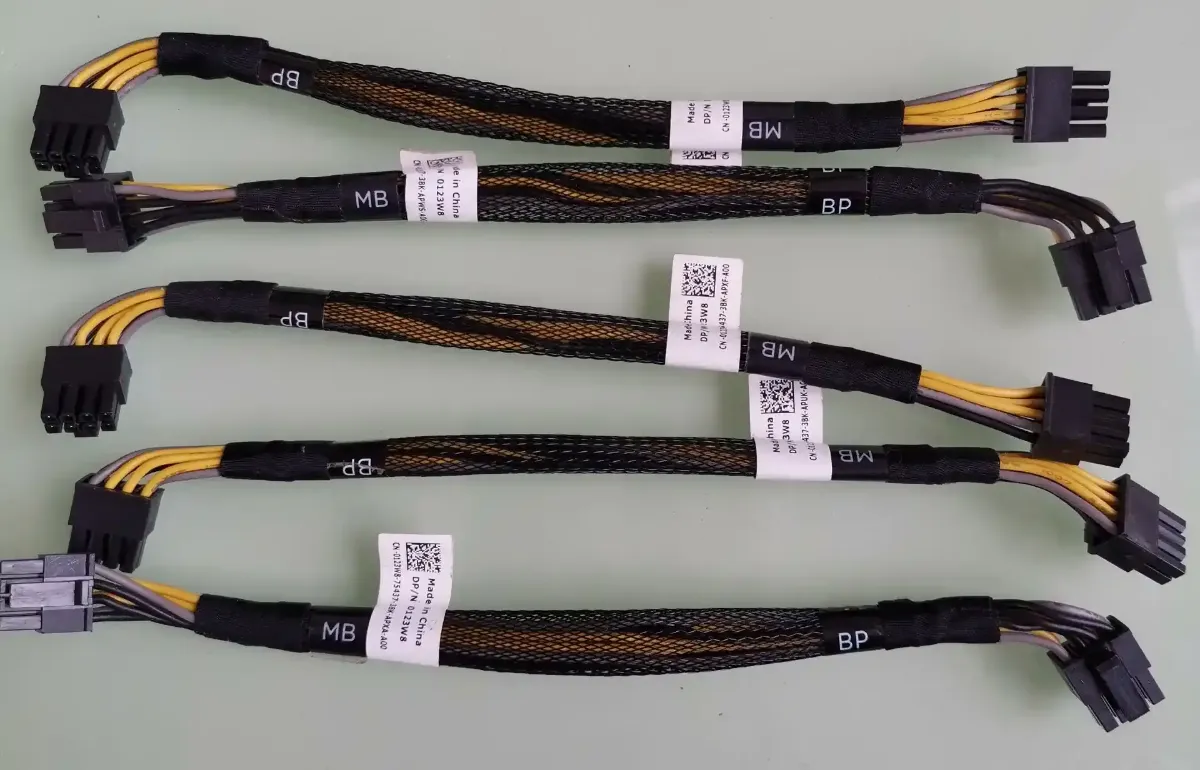
5. PC Build Checklist Step #5 – Stash Those Extra Modular Cables
Full-modular PSUs ship with spaghetti you think you’ll never need. But the next-gen GPU you crave might eat a 16-pin 12VHPWR. Tuck cables into the case’s basement or a ziplock bag taped inside the side panel instead of trashing them.
Likewise, spare SATA leads for future 8 TB SSD deals will save you midnight frustration.
6. PC Build Checklist Step #6 – Heat-Sink Your NVMe Drive
Marketing says “cool running”, yet even PCIe 4.0 controllers like Phison E18 throttle near 70 °C. Snap on the bundled aluminum slab or pick a beefy after-market heatsink. Keep clearance in mind—some tower coolers overhang the first slot.
- PCIe 3.0 drives: OK bare up to ~60 °C.
- PCIe 4.0: Heatsink strongly recommended.
- PCIe 5.0: Mandatory, plus active fans in many retail kits.
Tom’s Hardware testing on the Crucial T500 found the heatsink edition maxing out at just 53 °C, implying up to a 20 °C delta versus the bare drive during sustained transfers check the charts.

7. PC Build Checklist Step #7 – Master the Front-Panel Header
Power LED dead? USB 2.0 header unrecognized? Odds are those microscopic front-panel pins are mis-matched. Grab the manual (or smartphone photo) and align PWR_SW, RESET_SW, HDD_LED, PWR_LED exactly.
Pro tip: Use a pair of tweezers—or buy a one-piece Q-Connector.
8. PC Build Checklist Step #8 – Install Drivers in the Right Order
Chipset first, network & audio next, GPU last. Why? The chipset package seeds PCIe filters that prevent double-install weirdness. Clean out graphics leftovers with DDU in Safe Mode, then fresh-boot before you hammer Steam.
rem Example silent AMD chipset install
AMD_Chipset_Software.exe /s /noreboot
Tom’s Hardware even measured a 4 % 1%-low FPS gain after proper driver sequencing read their lab notes.
9. PC Build Checklist Step #9 – Respect SATA Cable Physics
SATA latches “click” for a reason. Overtighten with a sharp 90-degree bend and vibration can fracture the plastic shell over time. I aim for a gentle 45-degree arc and keep at least 10 cm slack for side-panel clearance.
Mixing old 3 Gb/s and new 6 Gb/s cables? They’re electrically identical—just replace frayed ones.
10. PC Build Checklist Step #10 – Disarm Static Electricity
Static kills faster than a BIOS flash gone wrong. Touch bare metal on the PSU (plugged in but switched off) before you handle DIMMs or GPU PCBs. Building on carpet? Stand on a $10 anti-static mat, wear cotton, ditch the wool sweater.
I once nuked a NIC pulling it from my case at 2 a.m.—one audible snap, one dead port, lesson learned.
11. Bonus Round – Five More Rapid-Fire Tweaks
- Flash the latest BIOS before OS install.
- Run
memtest86+overnight—catch DOA sticks early. - Stress-test CPU with Cinebench R23 loop; monitor VRM temps.
- Create a Windows restore image once drivers settle.
- Label every spare screw bag with painter’s tape.
Final Thoughts
That’s the whole PC build checklist. Knock out these 10+ tweaks and you’ll wake up to lower temps, snappier loads, and fewer gremlins. Skip them and, well, I’ll be seeing your frantic post on r/techsupport next weekend.
Happy building—now go flex that rig!