If you’ve shopped monitors lately, you’ve seen the alphabet soup: HDR10, HDR400, HDR600, maybe a flashy badge that promises “cinema-grade color.” I’ve been there—standing in a big-box store, squinting at demo loops that all look great until you bring the screen home. This is the no-nonsense explainer I wish I had the first time I bought an HDR monitor.
Quick vibe check. HDR isn’t just about turning brightness to 11. It’s about a wider dynamic range—deep, convincing shadows living next to brilliant highlights without crushing one or blowing the other. Do it right and sunsets feel warm, neon signs feel electric, and night-time scenes stop looking like murky soup. Do it wrong and your HDR monitor either looks washed out or weirdly dim.
Mini story before we dive in: I once “calibrated” a brand-new HDR monitor using a YouTube clip and vibes. Looked amazing in the trailer, then every game felt too dark. After a proper calibration (and learning what tone mapping really does), the same panel went from “return this” to “okay wow.” That swing taught me two things—specs matter, and setup matters just as much.
What is HDR?
HDR stands for High Dynamic Range. It’s not a marketing synonym for “bright.” It’s the ability to show detail in very dark and very bright areas at the same time. Where SDR (standard dynamic range) compresses that span, HDR keeps the space open. Think fireworks: the spark trails should glow while the night sky stays inky black, not gray. A well-tuned HDR monitor preserves both ends and the midtones between.
Three pillars make HDR believable:
- Peak brightness (nits): The headroom for intense highlights—metal glints, sun reflections, explosions. Higher peaks help, but they only shine when the rest follows.
- Black level: How low the panel can go without raising the floor. Deep blacks keep contrast alive; lifted blacks flatten scenes.
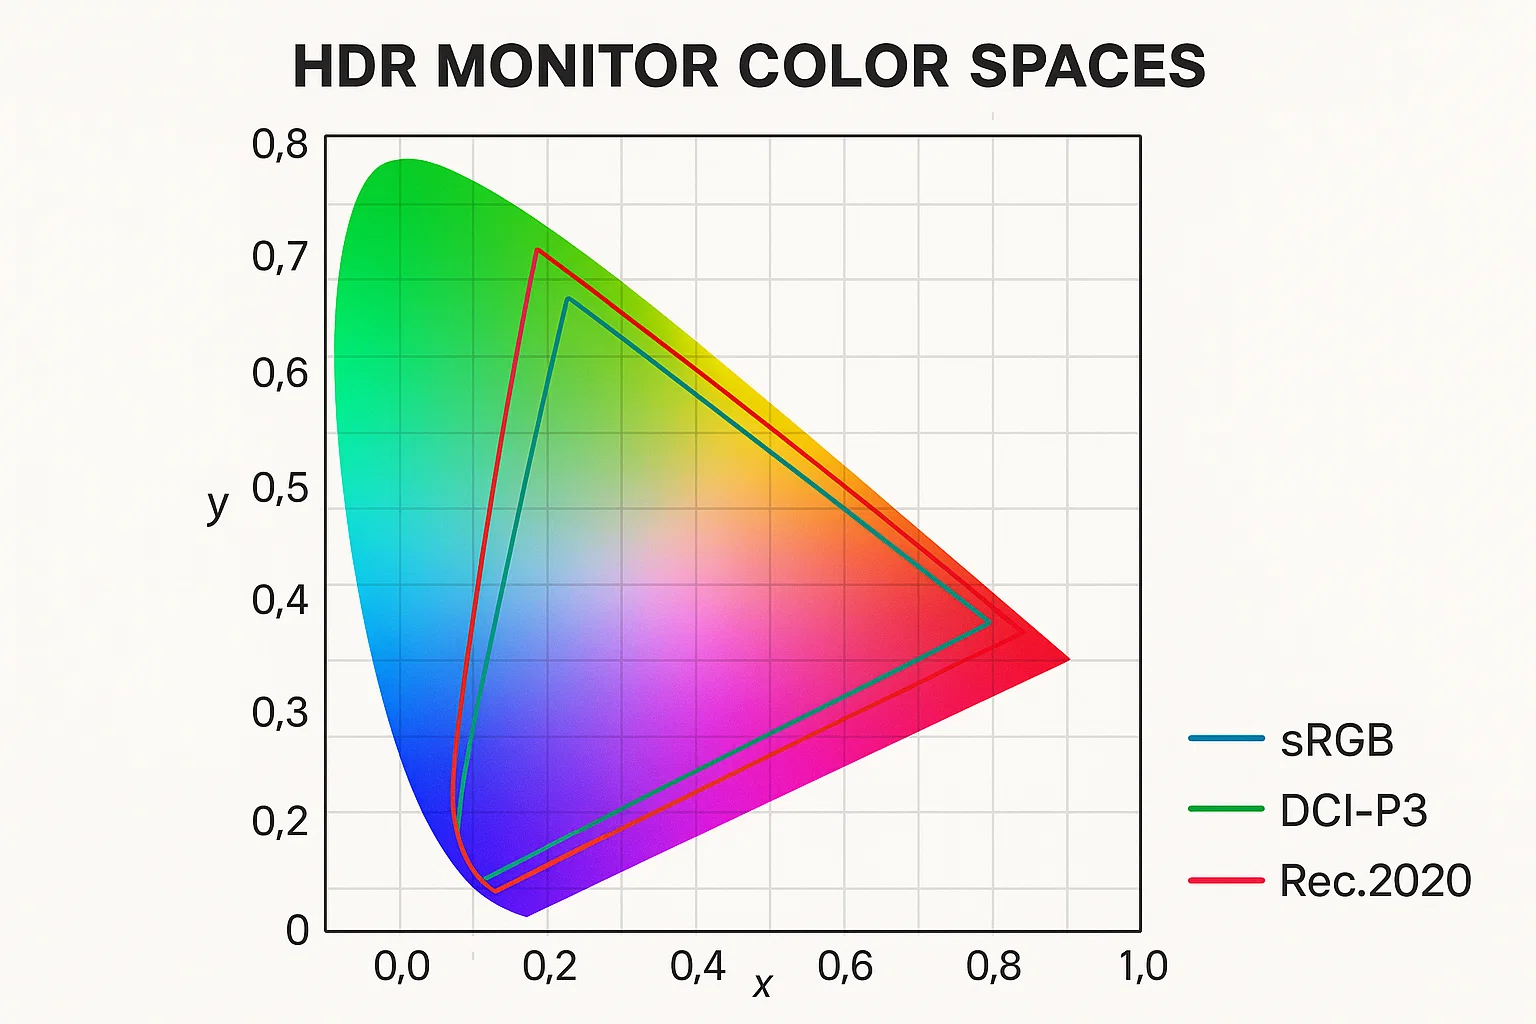
- Color depth & gamut: Wide color spaces (DCI-P3, Rec.2020) and 10-bit or more to avoid banding in skies and gradients.
There’s also the pipeline piece: to get true HDR, the signal needs to be captured or mastered with HDR in mind, stored with the right metadata, transported over the right link (HDMI/DisplayPort), and accurately rendered by your HDR monitor. If any hop in that chain fails, you’re basically back to SDR with extra steps.
One subtle thing folks miss: HDR isn’t obligated to be blinding. Night scenes can be delicate and low-key; the magic is in contrast and detail, not just raw candela. A polished HDR monitor will show the faint glow behind a window shade without nuking the lamp next to it.
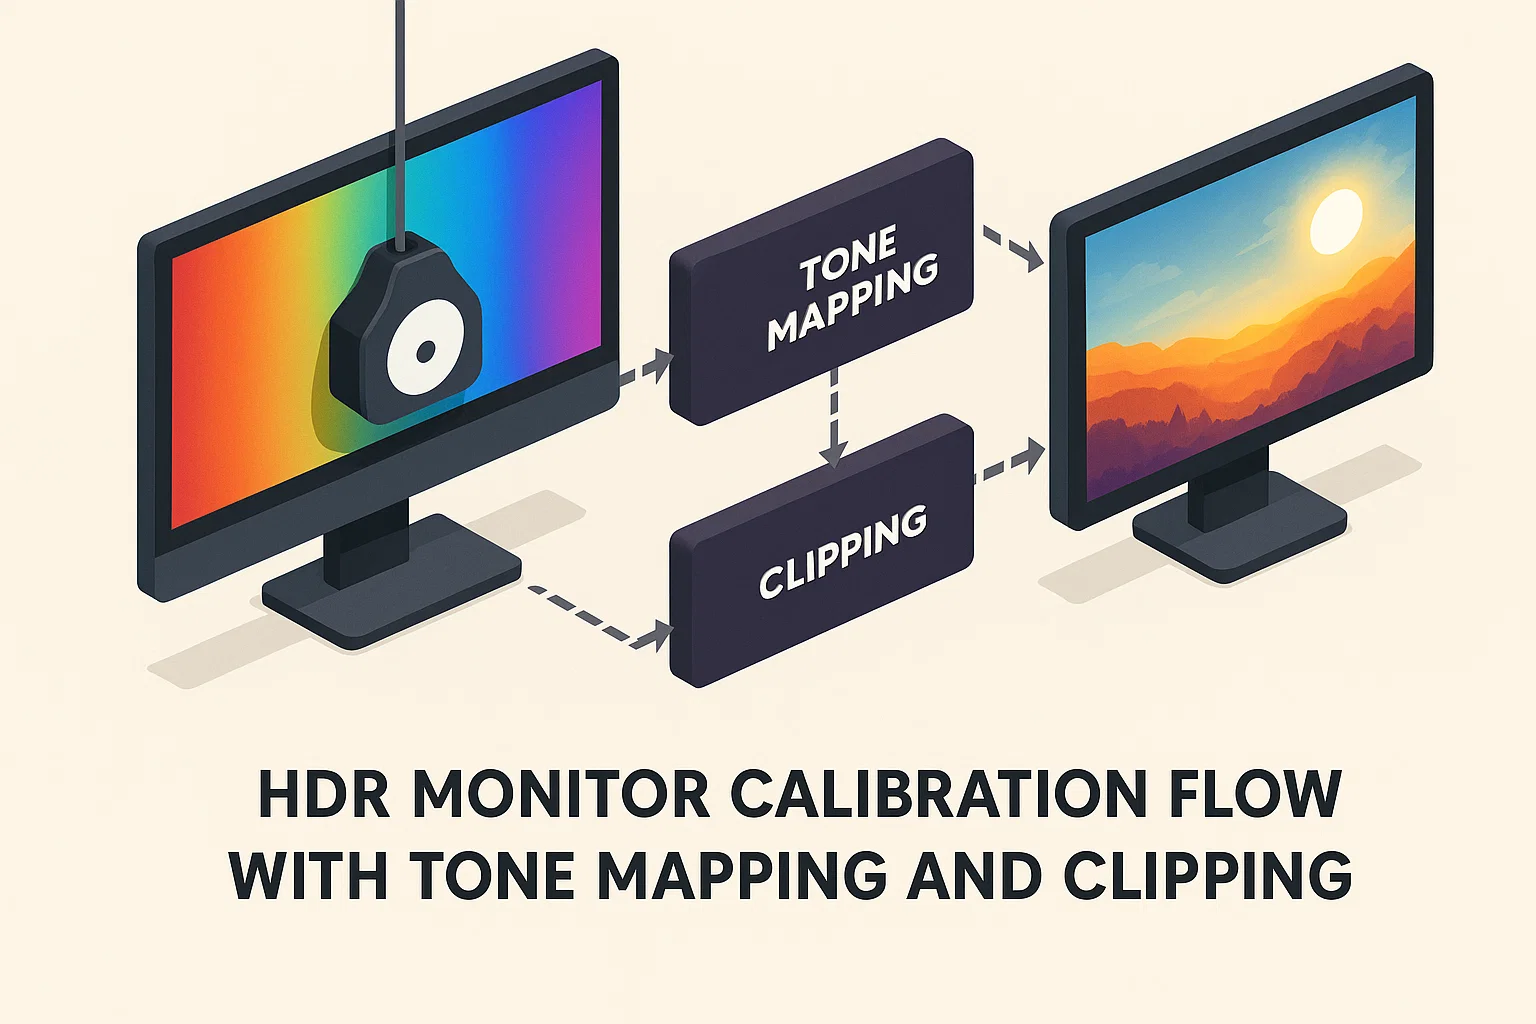
How tone mapping fits in
Content is mastered on insane reference displays—often brighter than your setup. Tone mapping is the math that remaps those creative intentions to your hardware’s reality. Different TVs and monitors do it differently. That’s why two HDR monitor models can look unlike each other with the same movie: they’re making different trade-offs about which highlights to prioritize and how to protect midtones.
# Quick Windows 11 route to enable and tune HDR # Press Win + R and paste: ms-settings:display # Then open "Windows HDR Calibration" from Microsoft Store # Adjust "HDR/SDR brightness balance" until desktop whites match your SDR comfort, # then run the app's peak brightness and color clipping tests. HDR10 (and friends: HDR10+, Dolby Vision, HDR Vivid, HLG)
Let’s decode the formats you’ll see on spec sheets. Spoiler: your HDR monitor probably lists HDR10 at minimum, and maybe more.
HDR10: the baseline
HDR10 is the common standard for games and PC video. It uses static metadata, meaning the mastering info (like target brightness) is set for the whole movie or game—not scene by scene. It expects 10-bit color but doesn’t mandate a specific resolution. Most consoles and PCs can output HDR10, and nearly every HDR monitor supports it. It’s the boring dependable friend that actually shows up to help you move.
HDR10+ vs Dolby Vision: dynamic rivals
Both HDR10+ and Dolby Vision use dynamic metadata: the creative team can nudge tone mapping per scene or even per frame. That’s huge for complex content—think moody interiors with candles followed by sun-soaked vistas. Differences you’ll care about:
- Licensing: Dolby Vision requires licensing; HDR10+ is royalty-free. That partly explains why you’ll see HDR10+ on more mid-range gear.
- Bit depth & color targets: Dolby Vision supports up to 12-bit and aims for Rec.2020. HDR10+ usually targets DCI-P3 with 10-bit. With the right master and screen, Dolby Vision can look cleaner in gradients and more precise in highlights.
On PC, dynamic-metadata support is still spotty across apps, cables, and GPUs. If your stack doesn’t line up, you’ll fall back to HDR10. That’s fine; a tuned HDR monitor running HDR10 can still look excellent.
HDR Vivid: a China-first take
HDR Vivid (often branded “菁彩HDR”) is a newer dynamic-metadata format you’ll encounter in Chinese streaming apps and some Huawei/Honor devices. Technically it lands in the same family as HDR10+ and Dolby Vision—dynamic guidance to help tone mapping. On Western PC gear it’s rare today, but if your HDR monitor shows the logo, think of it as extra compatibility rather than a must-have feature.
HLG: broadcast-friendly HDR
HLG (Hybrid Log-Gamma) came from NHK/BBC with one goal: live broadcasts that can play on both SDR and HDR screens without separate feeds. It’s clever and royalty-free. If you watch a lot of live sports or YouTube creators who master in HLG, having HLG on your HDR monitor is nice—but not essential for most PC workflows.
DisplayHDR: what the 400 / 600 / 1000 / 1400 badges really mean
Those VESA badges—DisplayHDR 400, 600, 1000, 1400—are shorthand for minimum performance targets. They’re not perfect, but they separate “marketing HDR” from honest capability. Here’s the simplified version most shoppers need.
| Badge | Peak White (typical min) | Black Floor (approx max) | Color & Processing | Backlight Behavior | What it feels like |
|---|---|---|---|---|---|
| DisplayHDR 400 | ≥ 400 nits | ≤ ~0.4 nits | ≥ ~95% sRGB; 8-bit panel with 10-bit processing okay | Global dimming (usually one zone) | Better than SDR on paper; contrast still limited. Entry-level HDR monitor tier. |
| DisplayHDR 600 | ≥ 600 nits | ≤ ~0.1 nits | Often 99% sRGB + ~90% DCI-P3 | Local dimming (multiple zones) | The first tier where HDR looks convincingly “HDR” if tone mapping is sane. |
| DisplayHDR 1000 | ≥ 1000 nits | ≤ ~0.05 nits | ~90% DCI-P3 typical | Local dimming with more zones or strong Mini-LED | Specular sparkle, daytime punch, far fewer blown highlights. A sweet spot for a performance HDR monitor. |
| DisplayHDR 1400 | ≥ 1400 nits | ≤ ~0.02 nits | ~90% DCI-P3 typical (some wider) | High-zone Mini-LED; top-end control | Flagship tier; stunning highlight authority. Expensive, but you see where the money went. |
Two caveats. First, zone count matters. A “local dimming” backlight with 8 zones can’t sculpt light like one with 576. Blossoming (the halo around bright objects) depends on both zone density and algorithms. Second, OLED plays by a different rulebook: near-perfect blacks and per-pixel “zones,” but lower full-screen brightness and ABL (auto brightness limiter) behavior. If you watch dark cinema, OLED makes a killer HDR monitor; if you need bright HDR in sunlit rooms, a Mini-LED LCD has the stamina.
How to pick an HDR monitor in 2025
- Target DisplayHDR 600 or better if you care about actual HDR impact. 400 is fine for spreadsheets, not fireworks.
- Decide panel tech by use: OLED for black levels and movies; Mini-LED LCD for bright rooms and long highlight punch.
- Check gamut and bit depth: Aim for ~90% DCI-P3 or wider; 10-bit panel (or well-dithered 8-bit+FRC) to avoid banding.
- Cable & port sanity: Use certified HDMI 2.1 or DisplayPort 1.4/2.1 as needed; cheap cables cause weird HDR issues.
- Software path: Confirm your OS/app pipeline (Windows HDR, console modes, streaming app codecs) matches the content you watch.
Gaming vs movies: who needs HDR more?
Movies are captured from reality, so HDR preserves real-world contrast that was there on set. Games are built inside a color pipeline; artists can design around limits. That’s why a well-graded movie often shows the biggest leap on a great HDR monitor, while games vary. When a game team really embraces HDR (native assets, correct tone curves), it’s breathtaking. When they treat it as an afterthought, SDR with good contrast may look cleaner.
Calibration playbook (15 minutes that change everything)
- Dark-room baseline: Kill room glare. Even an elite HDR monitor loses shadow detail if a lamp is bouncing off it.
- System HDR on: Enable OS-level HDR and update GPU drivers. Make sure the desktop doesn’t look strangely gray—adjust SDR/HDR balance.
- Run vendor or Windows HDR Calibration: Follow clipping patterns for red/green/blue and white; record peak nit readout if shown.
- App/game settings: Set max luminance close to your measured peak; tune paper white around 150–250 nits for comfort.
- Validate with real content: Use a handful of familiar scenes—dim interiors, bright exteriors, skin tones. If only demo reels look “good,” your tone mapping is probably off.
Common pitfalls (& how to dodge them)
- “It’s HDR, so it must be bright.” Not always. A great HDR monitor protects highlights without blasting your eyes 24/7.
- Wrong HDMI mode: Some inputs default to limited range or 8-bit. Force full RGB or YCbCr 4:2:2 10-bit as appropriate.
- Streaming app mismatch: Browser playback might cap at SDR. Use the native app that actually outputs HDR10/Dolby Vision.
- Overzealous tone mapping: If faces look waxy or highlights show weird neon edges, dial back “dynamic contrast” features.
Is HDR really that important?
Short answer: if you care about movies, yes. If you’re into competitive esports in brightly lit rooms, it’s less critical. For photo/video pros, HDR is fantastic for reviewing how an image rolls off into highlights—though you’ll still deliver SDR much of the time. For me, the moment I knew I’d never go back was a scene with rain reflecting streetlights. On an SDR screen it was “fine.” On a well-tuned HDR monitor, I could feel the cold pavement and see the ripple highlights dancing. That’s not a spec; that’s a vibe.
Gaming adds nuance. Some engines do HDR natively and brilliantly; others slap a curve on top. When it works, you get sunshafts that don’t clip, muzzle flashes that feel hot, and caves that are dark without being empty. When it doesn’t, SDR with good gamma looks cleaner. Don’t be afraid to toggle per-title.
Buying checklist you can screenshot
- DisplayHDR 600+ or OLED with solid ABL behavior
- ≥ 90% DCI-P3, 10-bit (or excellent FRC)
- Local dimming with real zone count (or per-pixel on OLED)
- HDMI 2.1/DP 1.4+ cables that are actually certified
- Windows HDR Calibration (or console HDR setup) completed
- Room control (glare management) considered
Related internal reads (do-follow)
- n8n AI Workflow: 21 Brilliant Power Moves for Fail-Safe Automation
- Claude Code Tips: 10 Game-Changing Secrets That Supercharge Your Dev Workflow
Author’s spare-parts box
Because I get asked a lot, here’s the FAQ-ish stuff I keep on hand:
- Cables: Label your “known good” cable and never mix it with the mystery drawer.
- Profiles: Save a calibrated HDR profile and a comfy SDR profile. Some afternoons I bail out of HDR desktop work and flip back to SDR until nighttime.
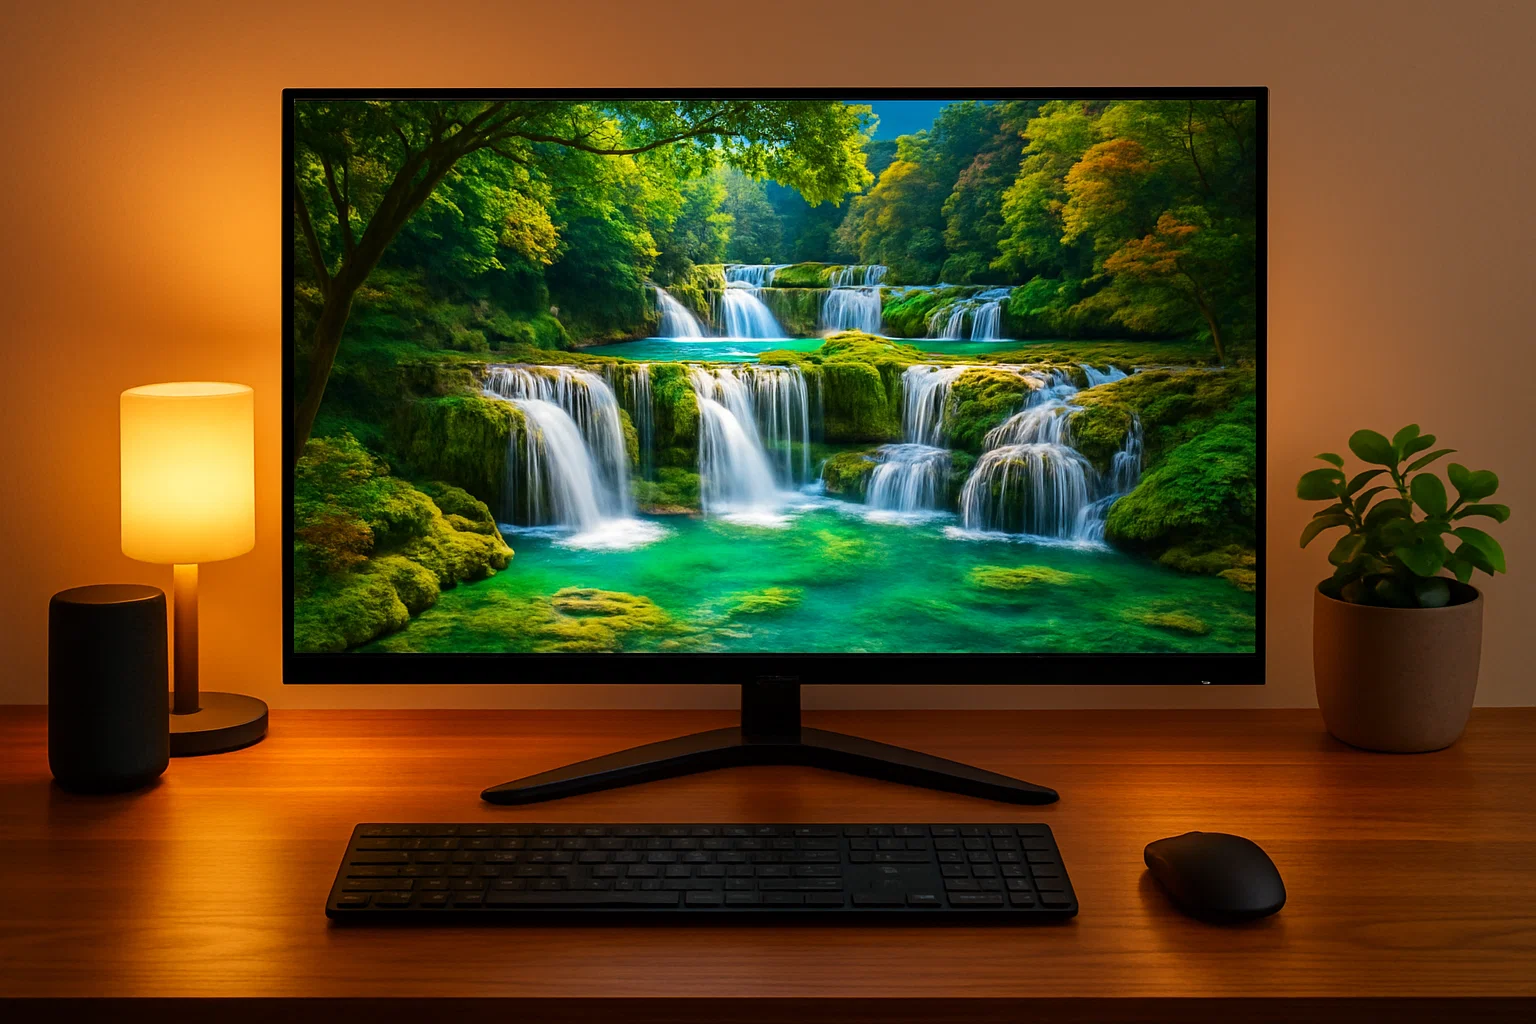
- Desk light: Bias lighting behind your HDR monitor reduces eye strain and makes blacks look deeper.
Deep-dive references (no-follow)
- VESA DisplayHDR Program — What the badges really certify and how tests are run.
- Dolby Vision Technology — Creator-side intent and dynamic metadata details.
Wrap-up time. Specs aren’t the whole story but they do set the ceiling. Pick an HDR monitor with honest brightness, well-controlled blacks, wide color, and the right format support. Then give it the fifteen-minute calibration it deserves. When you nail both, HDR stops being a checkbox and starts feeling like a window.